


One of the benefits of shooting family photos during Golden Hour is that it transforms ordinary, everyday views into something beautiful.
That scene could be an empty road, a barren park visible from your window, or even a trailer passing by late at night. These mundane sights can become your muse during the Golden Hours.
Shot thousands of photos?
FilterPixel culls them in minutes using genre-specific AI. Try DeepCull free.
In this blog of our family photography series, let’s first start with the basics:
What is the Golden Hour?
The golden hour starts roughly one hour after sunrise and one hour before sunset. It produces a soft, directional light that gives a magical glow.
During these hours, the sun is low in the sky and more diffuse (and redder) than usual due to being filtered for a greater distance through the atmosphere. The harsh shadows that you see at high noon will not bother you at golden hour.
Since the sun is so low on the horizon & the light is directional, it creates long, and soft shadows giving dimension to your photographs. You can use that soft dimensional light to achieve creative effects that aren’t possible at any other time of day.
1. Of Time & Location
You can use a golden hour calculator app like The Photographer’s Ephemeris or try other apps like Helios Golden Hour (for iOS) and Blue Hour Calculator (for Android) or PhotoPills for tracking it.
Whether you plan to capture golden hour photos or shoot under the midday sun, make sure to scout locations in advance. That is a golden rule no matter the occasion.
E.g.You’ll need to plan ahead of time for when the sun will set behind a row of buildings. More objects in a scene mean more shadows, which opens up a slew of creative possibilities. When looking for places to frame your shots, it’s also important to consider the position of the sun.

2. Camera Settings
Shoot in manual mode to get the most out of your backlighting and exposure.
Use a golden reflector to bounce light back to the subject’s face, or use a flash with a diffuser to fill in the dark areas of your subject. If you want more natural fill lights when using a flash, use yellow or orange-colored gels to match the light in the surrounding scenes. Keep in mind that the right camera settings are determined by the amount of light and the direction of the light.
When shooting portraits, use wide apertures and increase the ISO as the sun sets to compensate for the exposure.
Aperture values between f/7 and f/16 are recommended for landscape photography.
Use the value at which images are sharp for your specific lens – this is known as the lens’ sweet spot.
For landscape photography, use a tripod, lower ISO, and slower shutter speeds as the sunset and the light intensity decreases. Bracket 3 or 5 shots (depending on the dynamic range in the frame) and combine them in post-processing.
This should assist you in creating images with the entire frame properly exposed. When the sun is lower near the horizon, the light is diminished and the scene becomes dark. Use a tripod and lower ISO values when shooting. Long exposures are also ideal at this time.
3. Shoot RAW
Shooting in RAW format will give you greater freedom to fine-tune your images. This stands true no matter when you’re shooting, but it’s especially helpful for golden hour photography.
Even though the light is soft, the lighting is still in high contrast, making it easy to miss details. A compressed JPEG will only give you so much control in post, whereas RAW image files will retain much more detail and allow you to make major edits.
4. Positive Colours
In photography, colors are a powerful compositional element that may be utilized to portray emotion. Yellows, oranges, and reds make up the golden hour palette.
These are earthy tones (between 1000 and 4000 on the Kelvin color-temperature scale).
Warm colors elicit good emotions like joy, excitement, and optimism. The golden hour is especially beneficial to portraits because the quality of light improves skin tones. The light’s yellow-red tint makes the skin appear warmer rather than neutral or chilly.
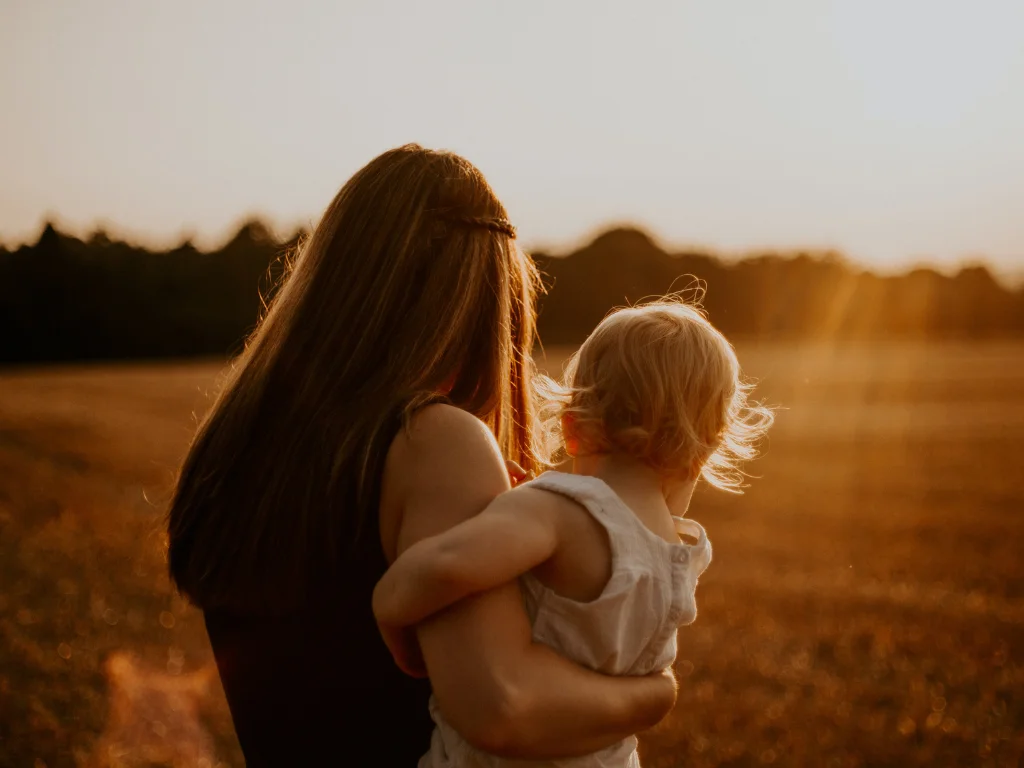
5. Backlight & Rim Photography
Backlight photography is when the light is coming from behind your model or subject. Backlighting creates a beautiful glow on the subjects and softens the shadows on their faces.
Use spot metering when shooting backlit portraits so that the camera knows to expose the area where the focus point is. If you don’t do this, your camera will read exposure based on the entire scene, which will underexpose your subject.
To keep detail in the background as well as on your subject’s face, add fill light. A simple 5-in-1 reflector should do the trick. Use the white side of a reflector to keep the fill light soft.
You can get a dramatic effect when the object you are shooting has some degree of translucence. The translucent part of the subject will have a strong light intensity, and the opaque part will be darker. This makes the subject seem to glow. It is even more evident when the background is dark. The contrast between the translucent and the opaque areas also makes the photo look more dynamic.
Rim Lighting– This is also backlighting, where you have the sun right behind the subject positioned in a way that it creates a halo around your subject – you will need to have a dark background for the rim lighting to be evident in your images.
6. Silhouettes
When the subject of your photograph is blacked out and the background is adequately exposed, you have a silhouette.
They are most effective with subjects that have a distinct shape. Silhouettes are a terrific method to add drama and mystery to your photo because of the high contrast with the subject and lack of detail. You can make them by aiming your camera at the light source (the sun) and positioning your subject between you and it.
To get excellent silhouettes, you need a lot of exposure. Set the exposure such that the brightest region of the image receives the best exposure. We aim to capture the sky in all of its colors and textures in our example. Your topic will be severely underexposed in such conditions.
Photographing silhouettes is an art form that requires the development of a keen eye. It’s not enough for your subject to appear black in your photograph; it must also be distinct and identifiable.
Include distinguishable features such as arms, hands, and legs if you’re filming a human figure. To emphasize your topic’s presence in the photo, pay attention to the compositional location and even stance of your subject.

7. Flare
When you point your camera at the sun, you get a lens flare. Light rays pass through the lens and strike the sensor directly; the lens scatters those rays for an appealing appearance.
The sun is low in the sky during golden hour, making lens flares simple – simply look through the viewfinder towards the sun to create the flare effects. With your subject partially blocking the sun, you’ll get flares that look like beams streaming from the subject’s silhouette.
Tip: Older lenses produce more exaggerated lens flare because they lack specific coatings designed to reduce lens flare.
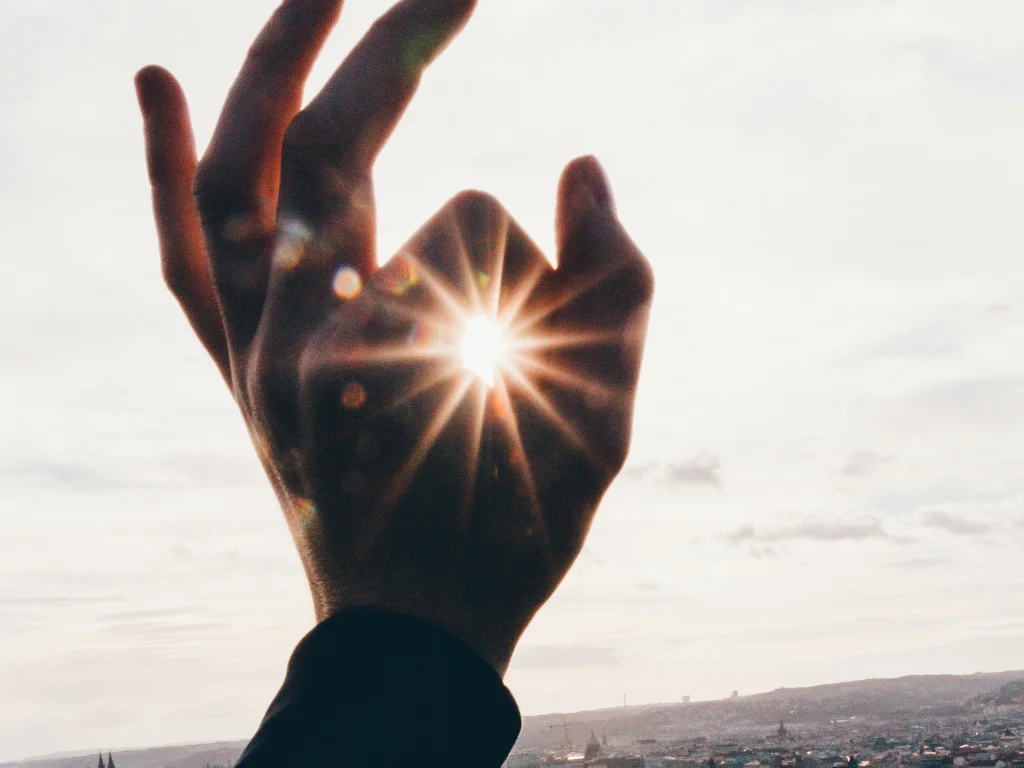
8. Starburst
Starbursts occur when an object partially blocks the rising or setting sun, for example, if you’re shooting in the countryside and your subject is a large boulder on a hill, position yourself so that the boulder blocks the sun the majority of the time.
Move the camera slightly while looking through the viewfinder until a tiny edge of the sun peeks out from behind the boulder.
When this happens, the sunlight will burst into a star pattern, with light points radiating outwards across the horizon and the entire scene. Shooting starbursts around sunrise and sunset is a great way to get attractive images – even with the most simple foreground subject.
Tip: Be careful when pointing your camera at the sun because the lens concentrates the sunlight onto your camera and can cause damage to your camera and eyes.
9. It’s clean & crowd-less
If you like taking photos of empty landscapes, the early golden hour is a perfect time to take photos. Most people venture outside later. During these early hours, you can enjoy the beautiful golden hour light, a calm location, and some privacy.
Another thing to take into account is cleanliness. In most places, cleaning is done at the end of the day or night. If you wake up early, chances are that you will arrive at a clean location.
10. Shadows
When taking portraits, the direction of the light has a significant impact on how they will appear. Vertical lights from above your model should be avoided because they cast unflattering shadows on the face.
“Raccoon eyes” is a particularly unflattering effect in portrait photography. This is where the brows cast a shadow over the eyes, giving them the appearance of dark circles.
Shadows add texture and detail to the image. They give a sense of volume and depth. During the golden hour, due to the position of long shadows will be produced. Use these to emphasize elements in the photo such as dunes, grooves, etc.
You can also take photos of the shadows of your models. And you can use the shadows as a photo composition element. Shadows can balance the warm reds and yellows from the sun with their darker colors.
Remember to keep your own shadow in mind, as it may get in the way and ruin the shot. This is especially important if you want to photograph yourself with the sun behind you.
Simply be aware of your shadow and check where it is before pressing the shutter release. If your shadow appears in the image, move around and position yourself so that it falls outside of the photo frame.
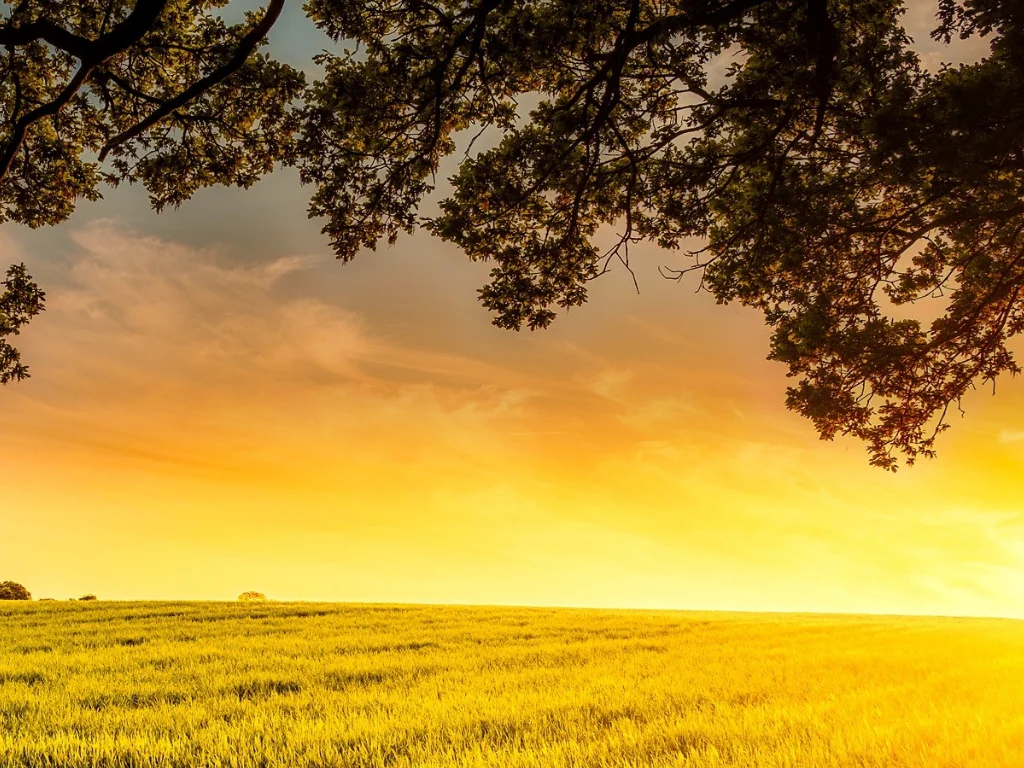
11. Of Barren Landscapes
Dry vegetation, lonely trees, empty paths – these can all turn into photography subjects and look beautiful in golden hour photography.
The gold tints and soft light effects will make even a mundane setting stand out.

12. Embrace the uncertainty
A cloudy sky works as a natural diffuser, creating balanced, even light. Make sure that the clouds are rolling out rather than coming in—and that there’s space between them. If it’s rained throughout the afternoon, and the sun is just starting to poke through, that’s your cue to head out and get shooting. Use the puddles and reflections to your advantage.
Wake up early in the morning to get natural mist and fog that will help create a soft, dreamy atmosphere.
Conclusion
There are numerous advantages to shooting during the golden hour. You can experiment with backlight photography or create silhouettes. Simply bring your camera and get ready to capture the golden lights of sunrise and sunset!
After you have mastered taking portraits during the golden hour, make sure to check out our next blog on “Dos and Dont’s of Family Photography”.
-Jun-19-2026-12-08-11-9138-PM.png)
-2.png)