


In this blog, we will cover step-by-step how to edit photos in Lightroom and all the settings available for editing photos.
Photographers generally have a hard time understanding the difference between lightroom and Lightroom Classic so first let’s become clear on that.
Shot thousands of photos?
FilterPixel culls them in minutes using genre-specific AI. Try DeepCull free.
Adobe Lightroom (previously Lightroom CC) is a cloud-based tool for photographers, editors, and bloggers to organize edit, and share their photos. It works across desktop, mobile, and web and is very helpful as photographers can sync their edits across multiple devices.
On the other hand, Adobe Lightroom Classic is a desktop software for photographers that would like to have more control over their photos using a large number of features than Lightroom does. Adobe Lightroom Classic doesn’t support mobile applications.
With the difference between the two cleared, let’s look into the different editing settings present in Lightroom:
Pre editing:
Before editing a photo in Lightroom, make sure the photos are shot with the right settings. This includes shooting photos in RAW format as it helps retain all the information within a photo, giving us more control while editing the photos.
Another important note is to never shoot any photos in overexposed settings as they cannot be fixed as easily as underexposed photos.
In fact, many photographers shoot deliberately with underexposed settings as they can achieve some great results after editing.
Importing in Lightroom
After the shoot, simply connect the camera or SD cards to PC or laptop and import all the photos.
Next open Lightroom and click on click on “add photos” to import photos. With a simple drag and drop, all the photos will be imported.
Importing all the photos to Lightroom can be a slow process if the number of photos is huge.
Note: To quickly weed out the bad shots, we recommend making the photos go through FilterPixel first, which is an AI Culling software. It will weed out all the bad photos with focus and eye quality issues by tagging them as rejects.
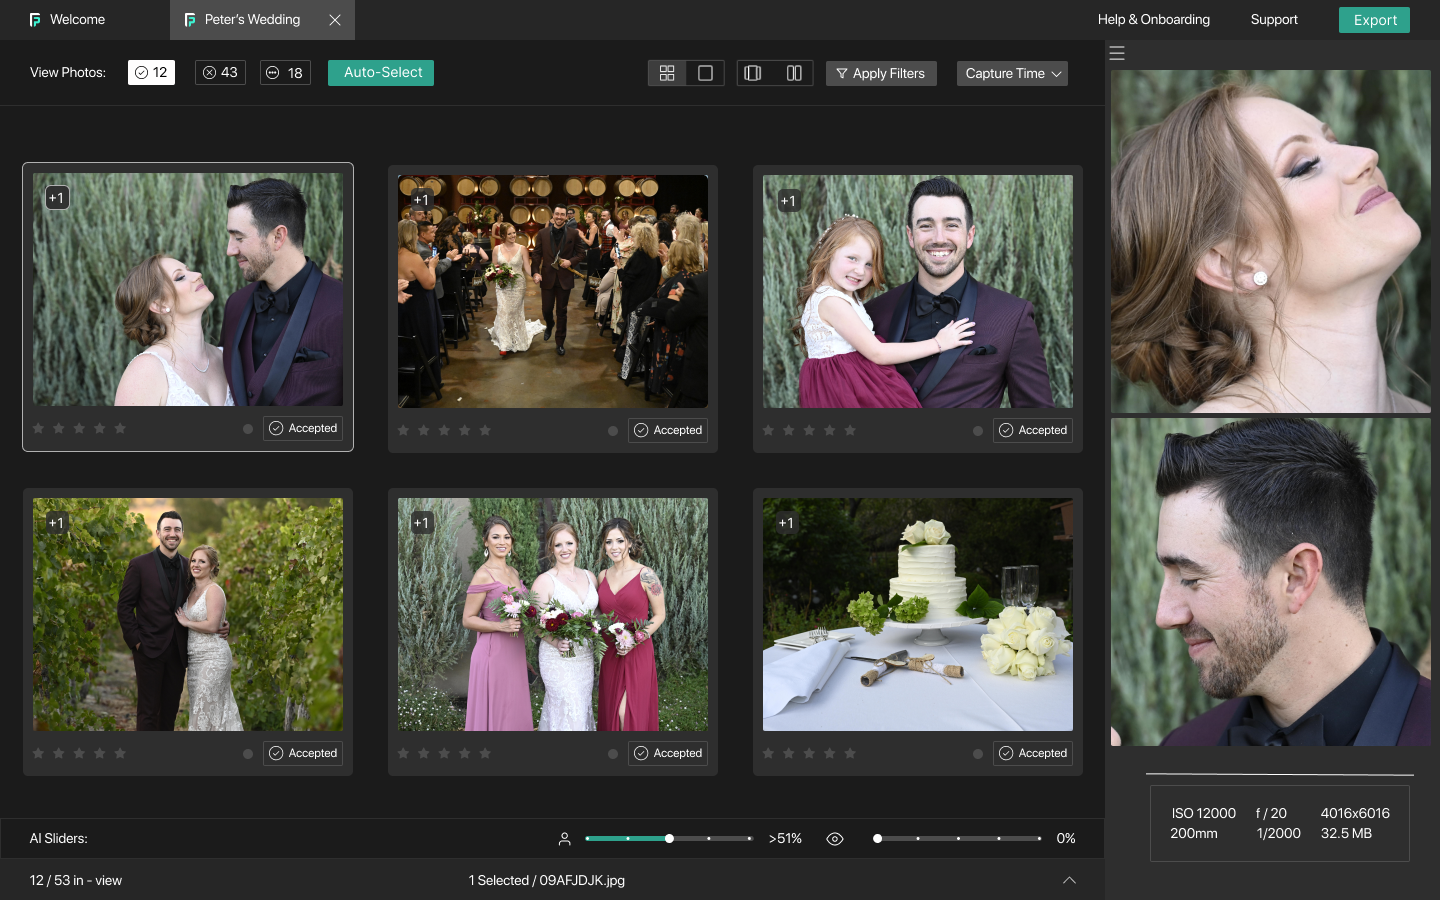
After selecting the best photos, Photographers can drag and drop the photos straight into Lightroom for editing.
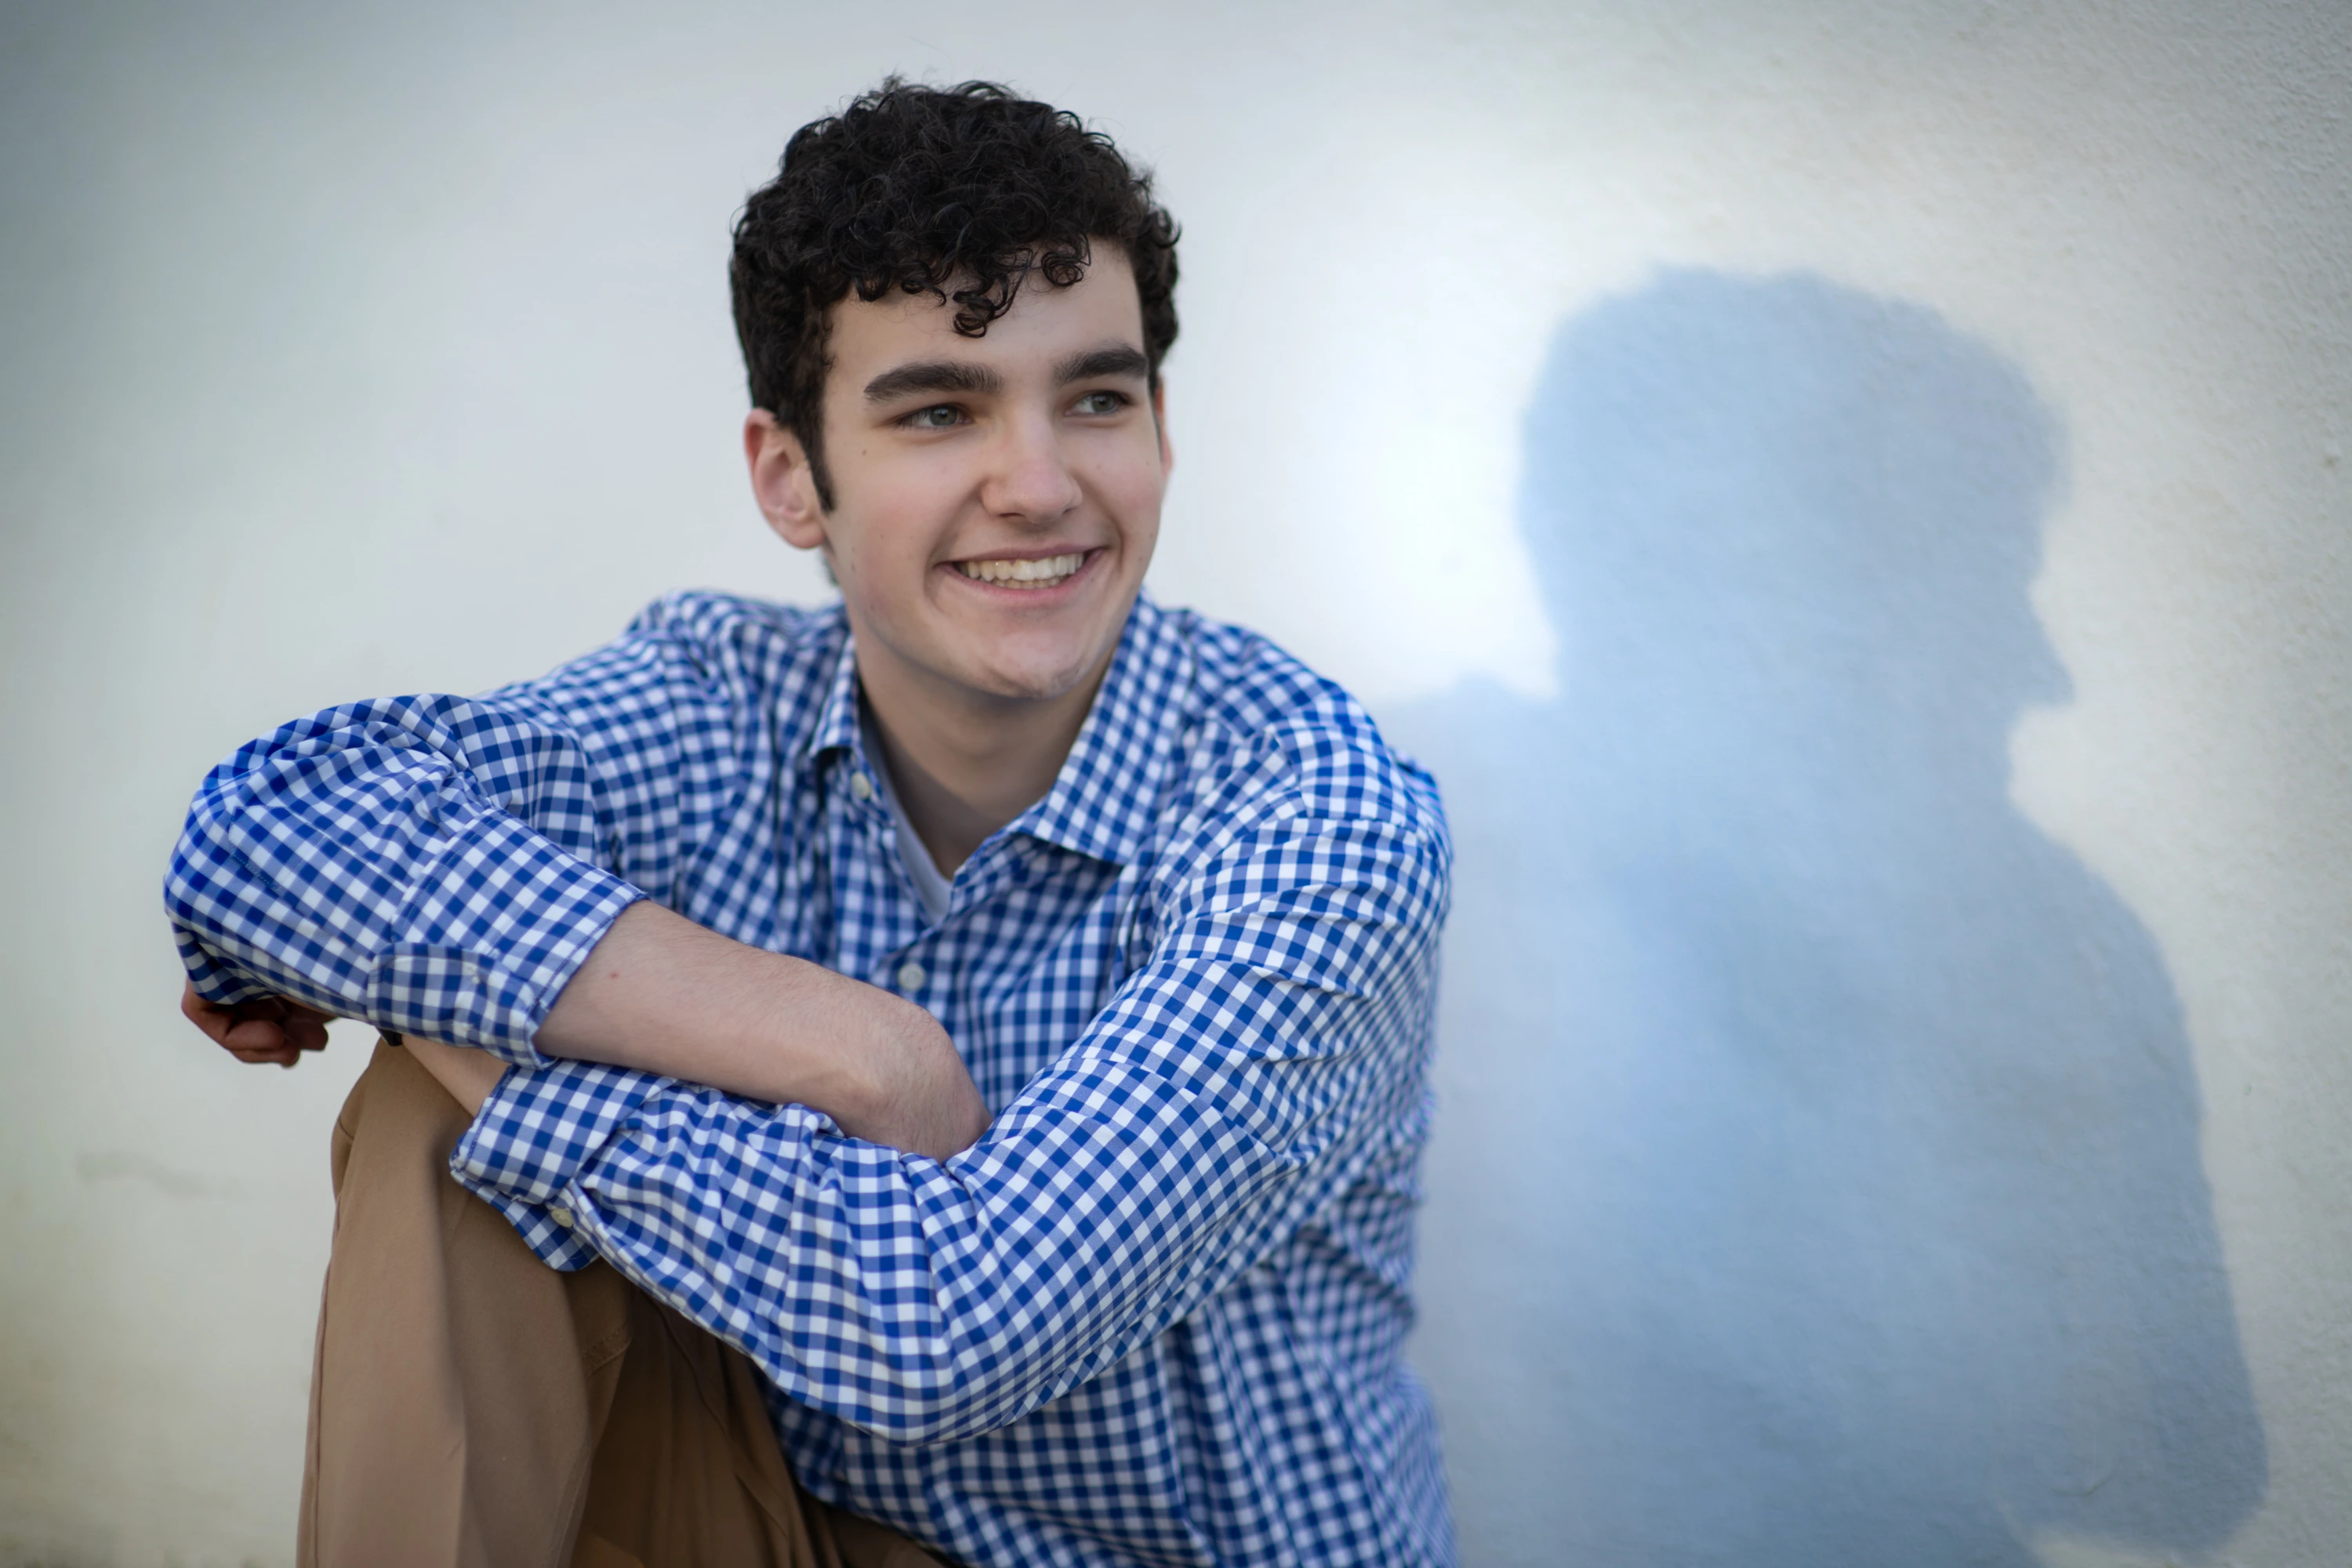
Photo Credit: Marshall Hawkins From Sundance Photography
We will see all the changes made by different settings using Lightroom in the photo above.
Light
This is one of the most important parts of editing. Sliders include Exposure, contrast, highlights, shadows, whites, and blacks.
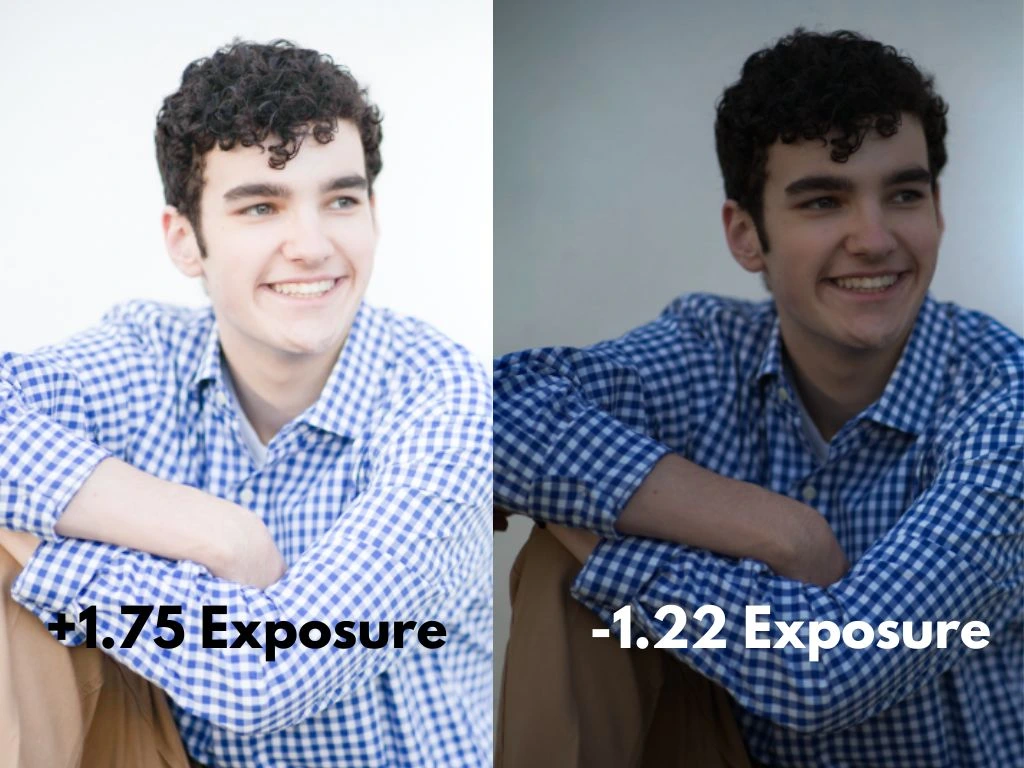
Exposure:
This slider increases the overall brightness of the photo. Do not drag the exposure slider too much as the photos can look too blown up or too dark.
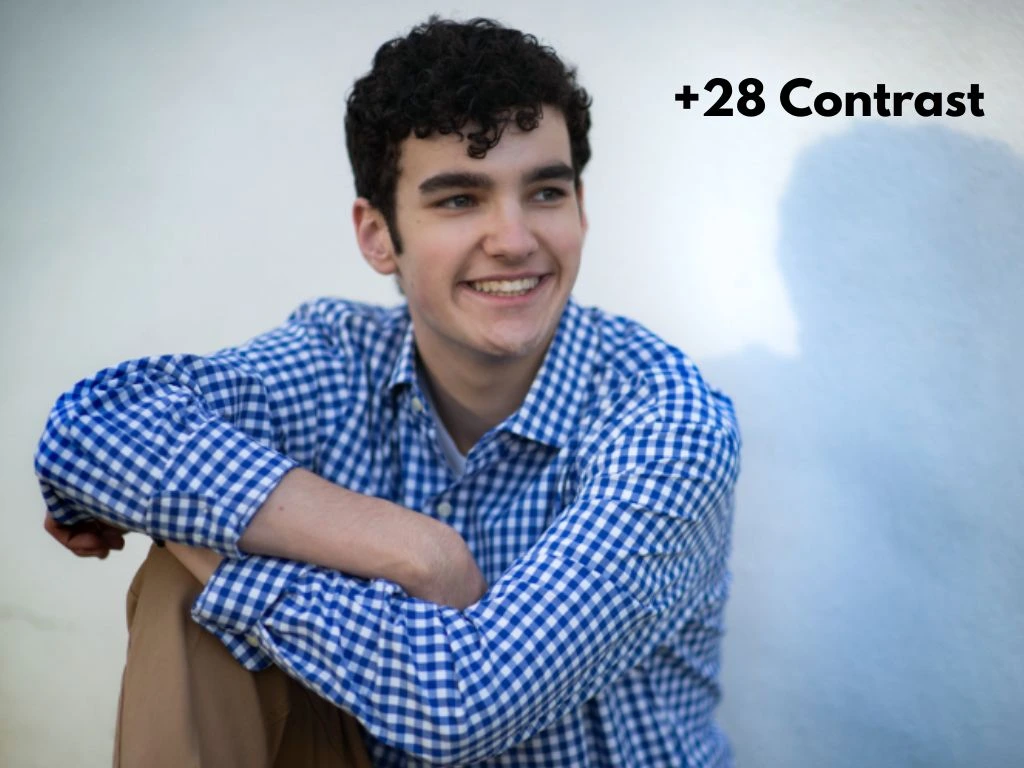
Contrast:
This slider helps in defining the light and dark areas of the photo. Dragging this slider to the right can help make the photo ‘pop’ more.
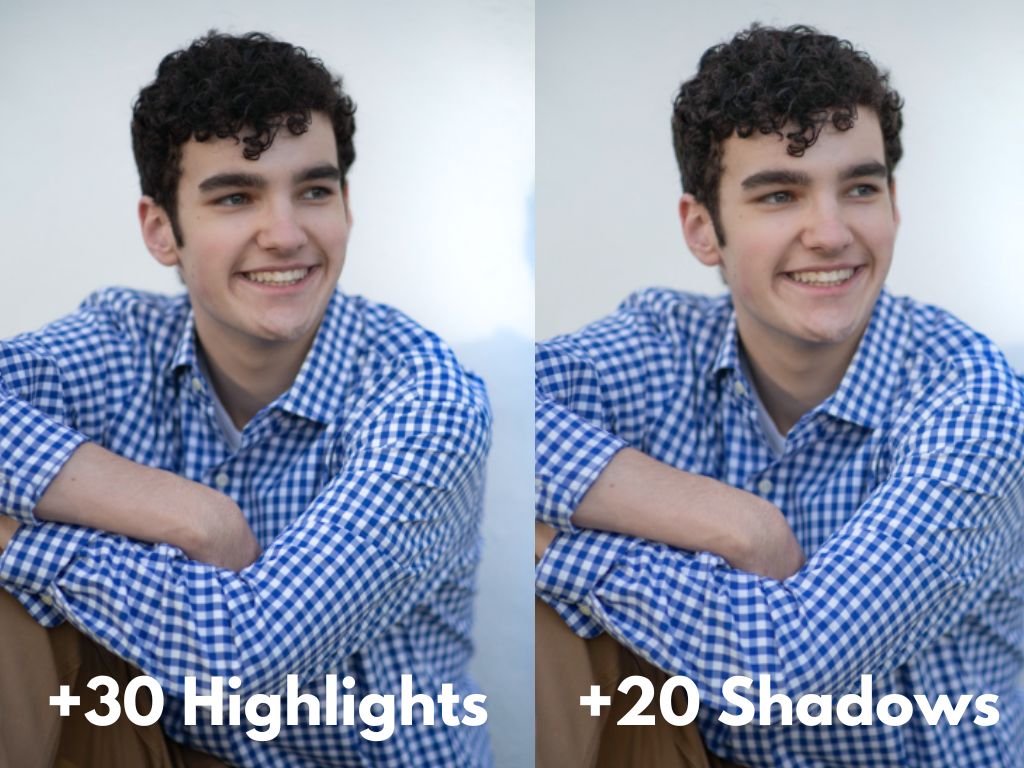
Highlights:
This slider is for the brightest parts of the image. Highlights can reduce or increase the details of the brightest parts of the image depending on how bright the photo is.
Shadows:
This slider is the exact opposite of the highlights slider. It controls the darkest part of the image and photographers can lower or reduce the details of those parts depending on how dark the photo is.
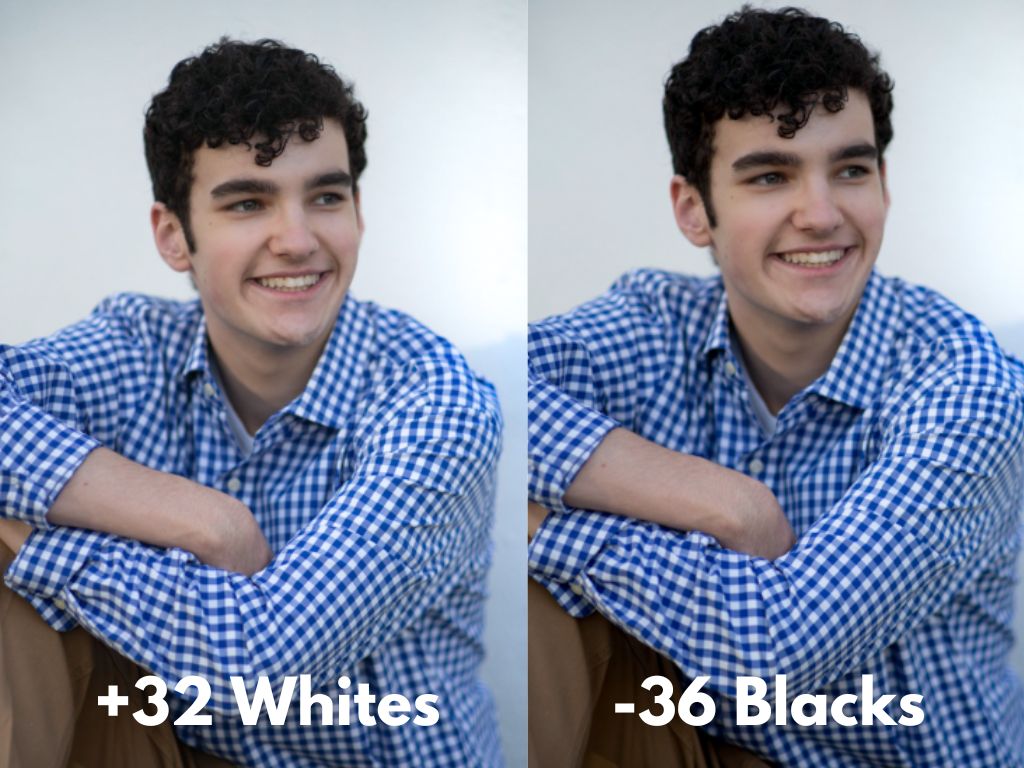
Whites:
This slider sets the white point for the highlights. It goes hand in hand with highlights.
Blacks:
Just the exact opposite of the whites, this slider sets the black point for the shadows of the images. It goes hand in hand with the shadows slider.
The intensity of these sliders varies from photo to photo. In some indoor photos, photographers might need to bump up the exposure a lot whereas, in photos that are shot in broad daylight or outdoor photos, the exposure is mostly fine or needs to be adjusted lower than usual.
Color adjustments
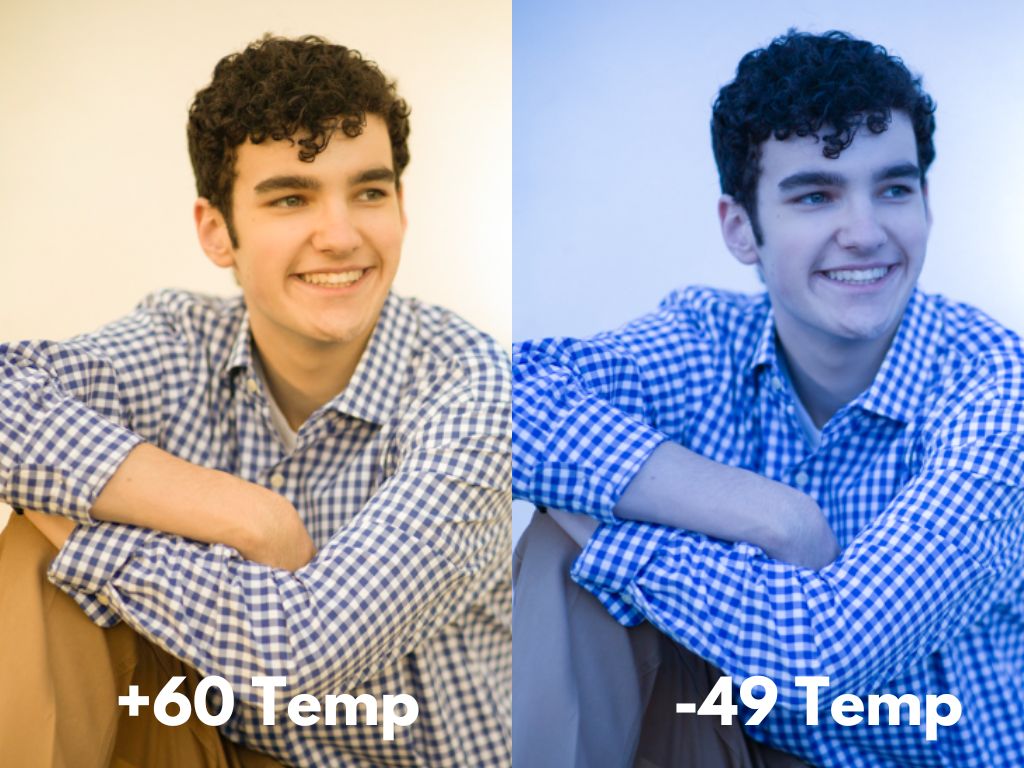
Temperature:
Temperature makes the photos have a more cool look or warm look to them. Moving the slider to the right or orange side increases the warmth of the photo and moving it to the left or blue side increases the cool tones of the photo.
Be careful while playing around with the temperature slider as the wrong temperature can make the color of the skin look too orange.
Tint:
Tint helps the photos to add or reduce the magenta or pink hue present in the photos. This can be used together with the temperature slider to adjust the skin color when the temperature is too warm.
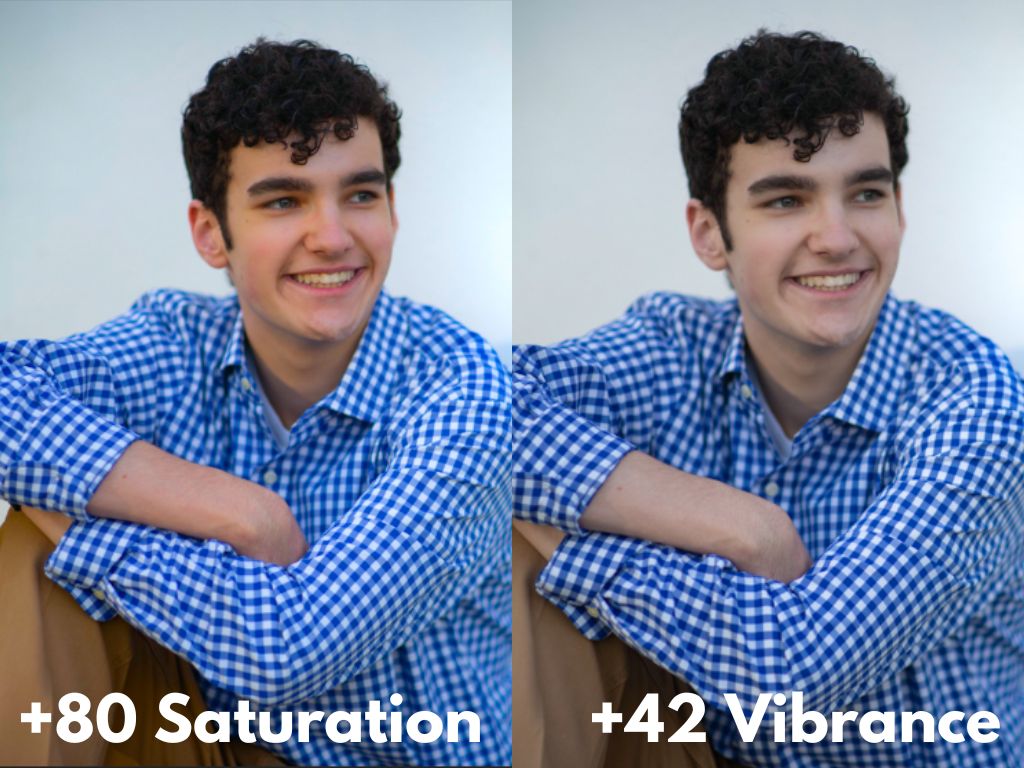
Saturation:
The saturation slider brings up all the colors of the image if we drag it to right. Dragging the photos left will of course de-saturate the colors of the photo.
Vibrance:
The Vibrance slider brings up all the colors of the image while keeping the skin tone intact. In portraits, this is more useful than the saturation slider as it helps bring out all the colors (like the saturation slider) without messing up their skin color.
Color Mix
The color mix helps in controlling the individual colors of the image. Photographers can change the hue (color tone), saturation, and luminance of every individual color of the photo.
The luminance controls the brightness of the color whereas hue can be used to change the color tone of one color to another.
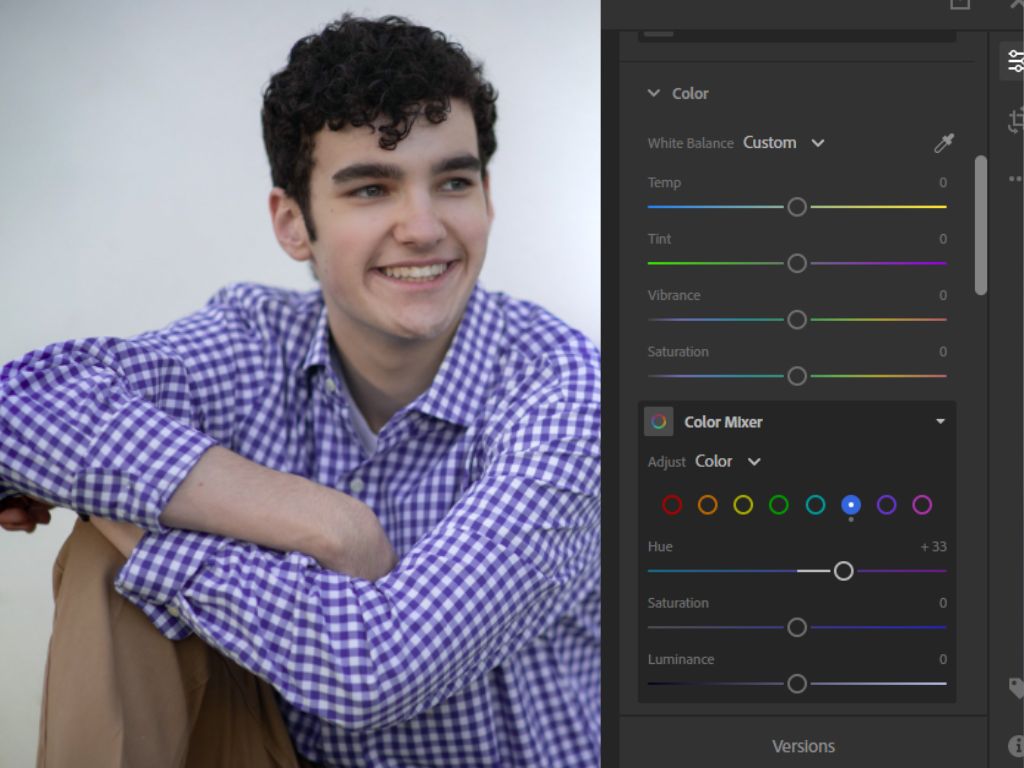
For example, the color of our subject’s shirt has been changed from blue to purple when we dragged the hue of the blue slider to right.
This is also useful in editing different shades present inside black-and-white photos.
Effects
Texture:
The texture slide helps the photo to increase or decrease the texture of the image without affecting the fine details of the photo.
For portraits, photographers can decrease the texture a bit to help minimize the appearance of skin texture. Since we have increased it, the skin texture is appearing more defined.
Clarity:
Clarity helps in enhancing the image, especially the structures of the image. Make sure not to increase it too much in close portraits as it will make the wrinkles, acne, and other imperfections more noticeable.
Dehaze:
Dehazing is mainly used for clearing the haze and fog in a photo. It helps get more clarity and sharpness in the photo.
Grain:
Use this slider to add more grain to the photos. Many photographers add more grain intentionally to their photos, especially to the out-of-focus photos, to give them more of a dreamy or artistic look in their photos.
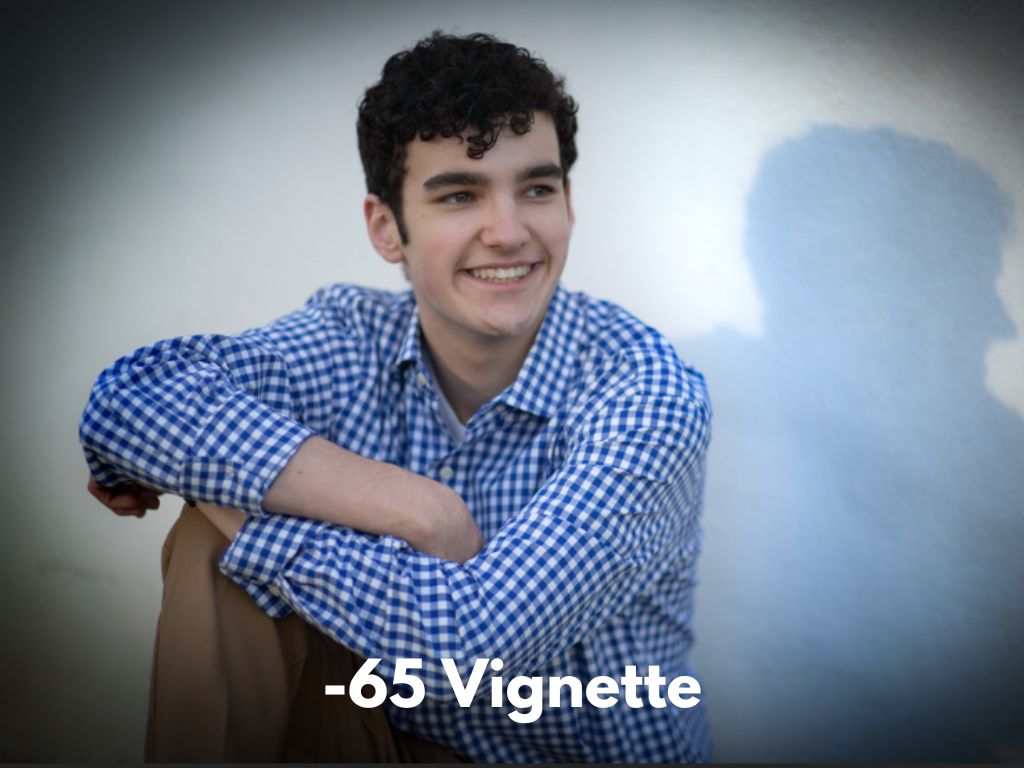
Vignette
Increasing the vignette darkens the borders of the photo highlighting the subject in the center. On the other hand, decreasing the vignette brightens the borders.
Optics:
Chromatic Abberation:
Turning it on will correct the weird color mistakes done by the camera.
Profile correction:
This will help correct the compression made by the lens in the image.
Details
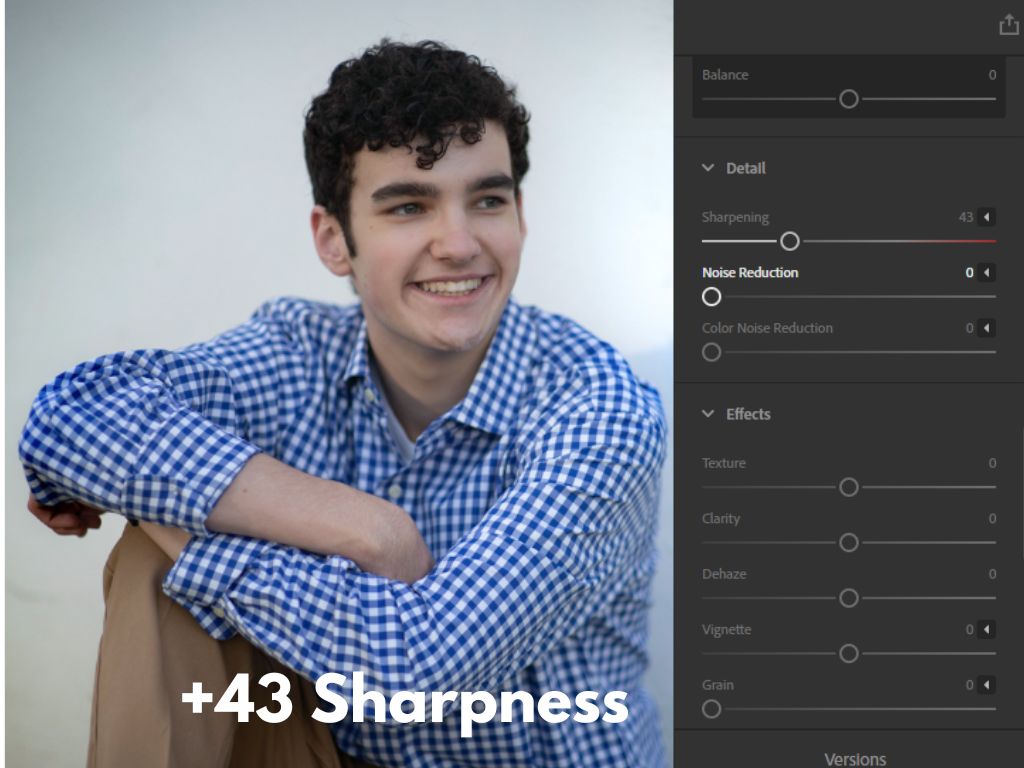
Sharpening:
Sharpening photos too much can look bad when posting on social media or when printing them out. What Lightroom does is, it increases the contrast among the edges of a photo giving the illusion of sharpness among photos when the details are not present.
Noise reduction
As the name suggests, noise reduction helps in reducing the noise present in the photo. Increasing this slider will make reduce the noise but also increase the smoothness of the photo.
Now since we have edited all the elements of a photo. It is time to crop and straighten the photo.
Straightening and cropping
After we are done with editing, it is time to crop and straighten the photo. Make sure the photo’s composition is correct and the horizon is straight.
Crop out any distractions the photo has, and try to have the viewers’ eyes only go to the subject. There are also multiple cropping options available in different dimensions.
Exporting photos
Once satisfied with the changes, export the photos to the Laptop or mobile device.
Conclusion
We hope this guide on editing photos in Lightroom has helped you learn about all the settings of Lightroom. Make sure to check out our blog on using Lightroom presets to learn about buying and using the perfect preset for your photos.
-Jun-19-2026-12-08-11-9138-PM.png)
-2.png)