


In the dynamic world of photography, efficiency is key. Whether you're a professional photographer managing a high volume of images or an amateur enthusiast looking to streamline your workflow, finding the right tools can make all the difference. Enter FilterPixel, a revolutionary AI-driven software designed to simplify the photo culling and editing process. In this blog, we'll take an in-depth look at how FilterPixel works and how it can transform your post -production experience.
Shot thousands of photos?
FilterPixel culls them in minutes using genre-specific AI. Try DeepCull free.
Overview
FilterPixel is a cutting-edge photo culling & editing software that employs AI algorithms to identify and tag undesirable photos swiftly. And then allows you to edit your pictures seamlessly using AI. Whether it's detecting out-of-focus shots or closed eyes by categorising images into rejects, duplicates, and top selections or readily using expert editing profiles, FilterPixel simplifies the culling & editing process, relieving the photographer of 80% workload.
Signup
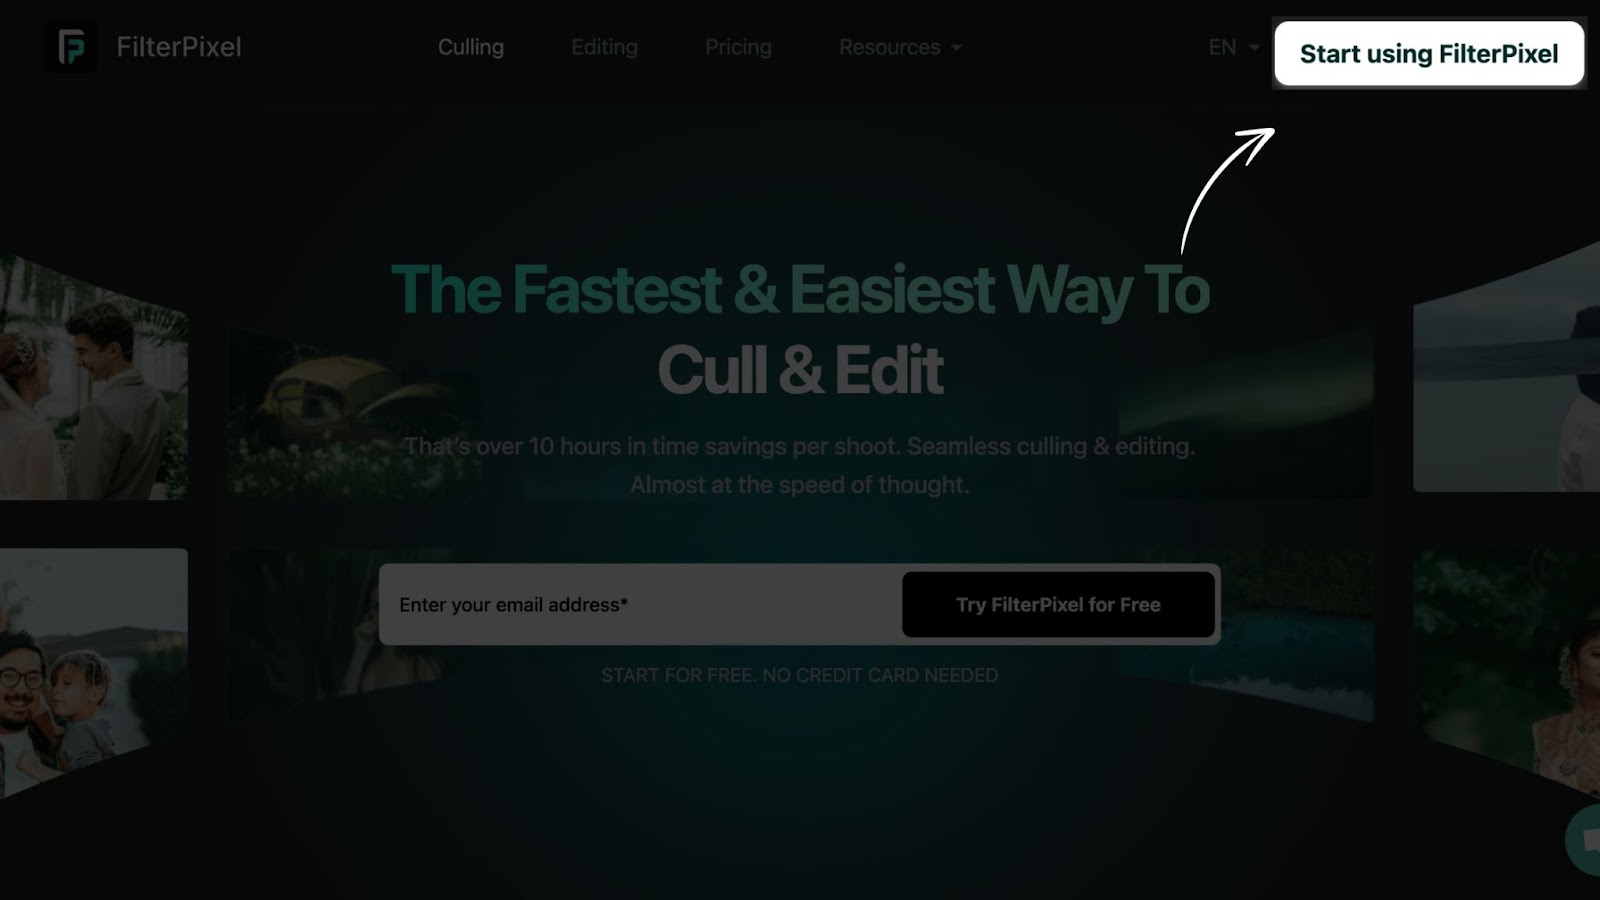
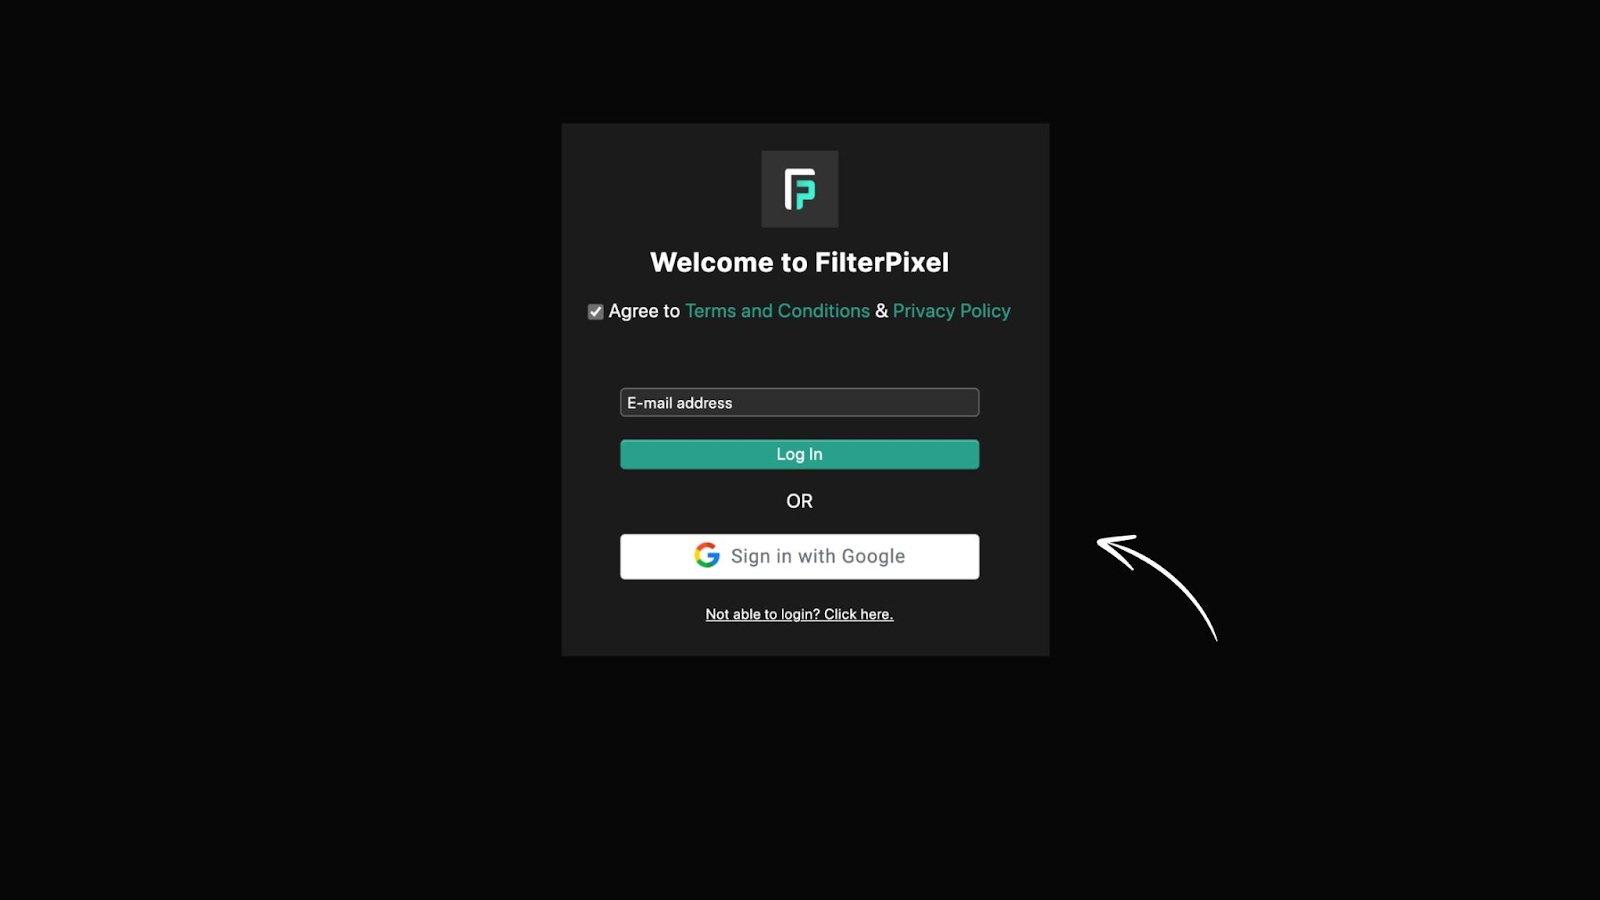
All you gotta do to get started with FilterPixel is to visit filterpixel.com. Click on “Start Using FilterPixel” & fill out the details or sign in with google or Facebook.
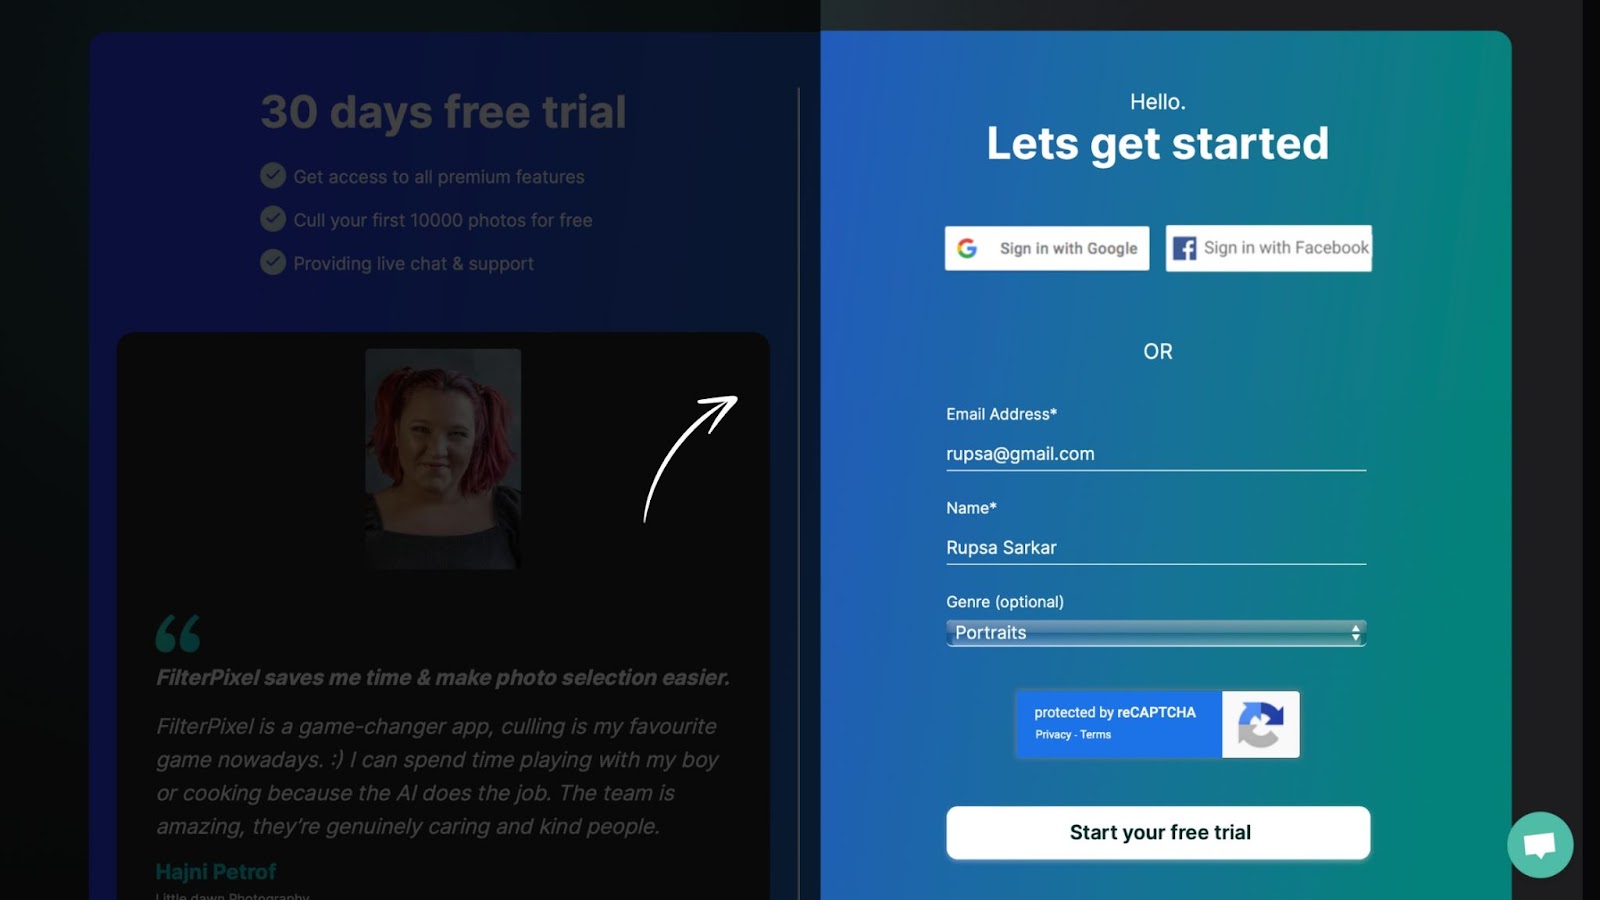
Solve the captcha for verification and it will automatically redirect you to the download page.
To sum up:
- Visit filterpixel.com and click on "Start using FilterPixel."
- Fill out the required details or sign in with Google or Facebook.
- Solve the captcha for verification.
- You will receive an email with the download link for the software.
Download & Install
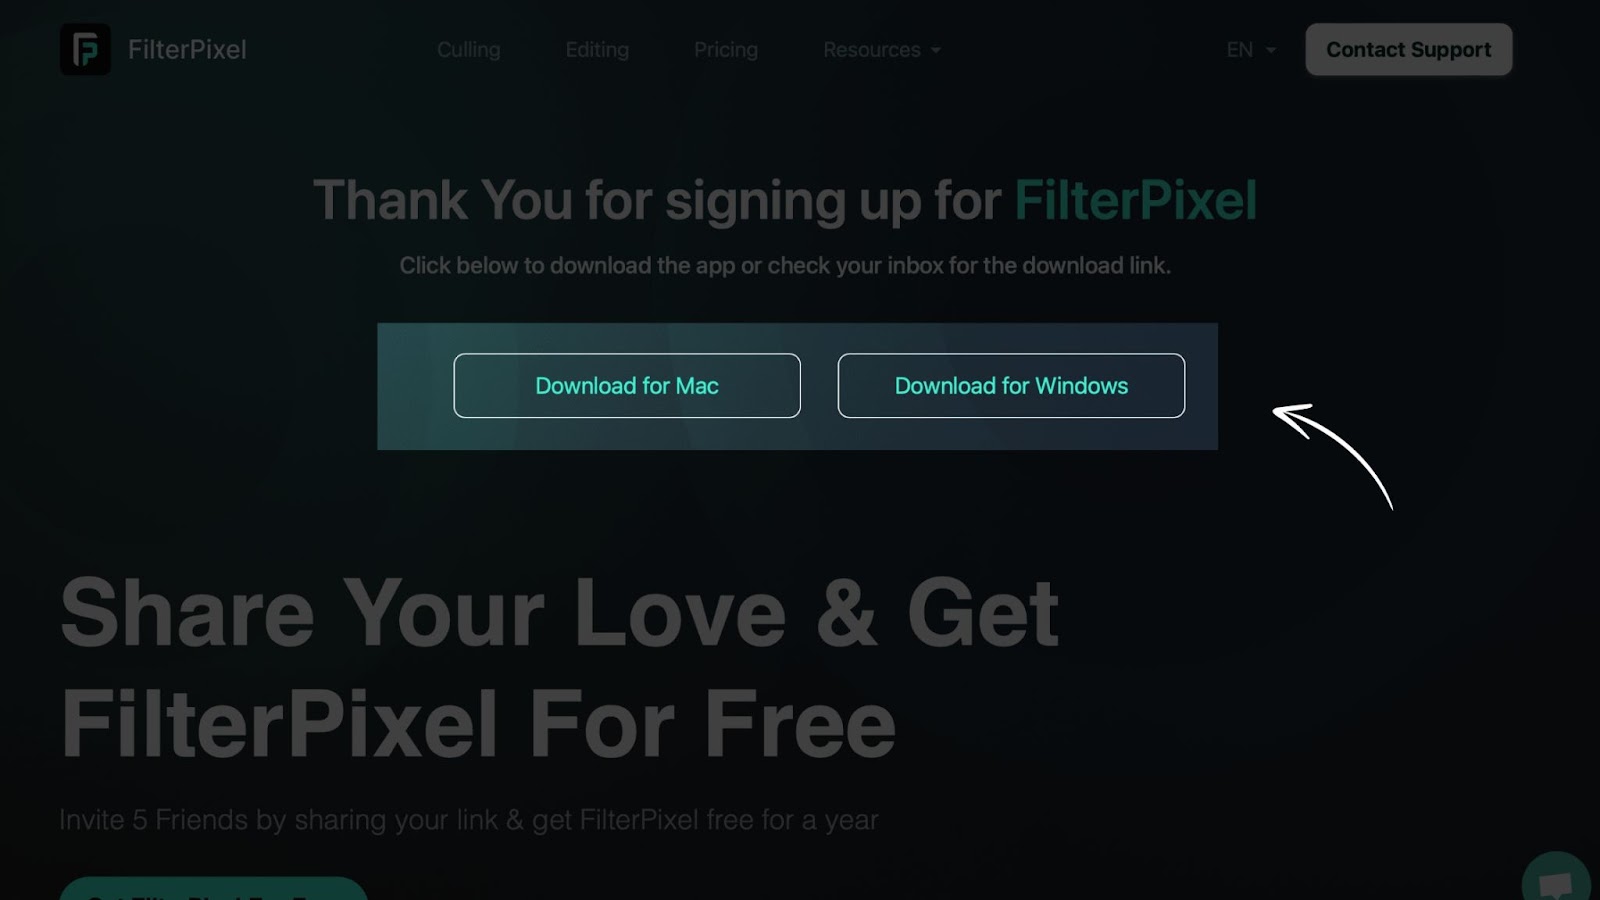
Now after the download page is open, you will see two options, one is FilterPixel for Mac and the other one is FilterPixel for Windows, click according to your device availability.
Also, in the meantime you also have received an email from us, onboarding you and the email also has the download link for the software, you can download it from there too. Now after downloading Install the software as you would usually do. And you are all set to start your FilterPixel Journey!
To sum up:
- Choose the appropriate software for your system (Mac or Windows) and download the software.
- Alternatively, use the download link provided in the email.
- Install the software following standard procedures.
Tip: Check our help desk article on How to install FilterPixel.
Log In
After the installation process is done, now simply open the software and login, keep your email inbox handy as you would need an otp. After submitting the otp you are all good to go!
To sum up:
- Open the software and log in using your credentials.
- Verify your login with the OTP sent to your email.
Creating your First Project
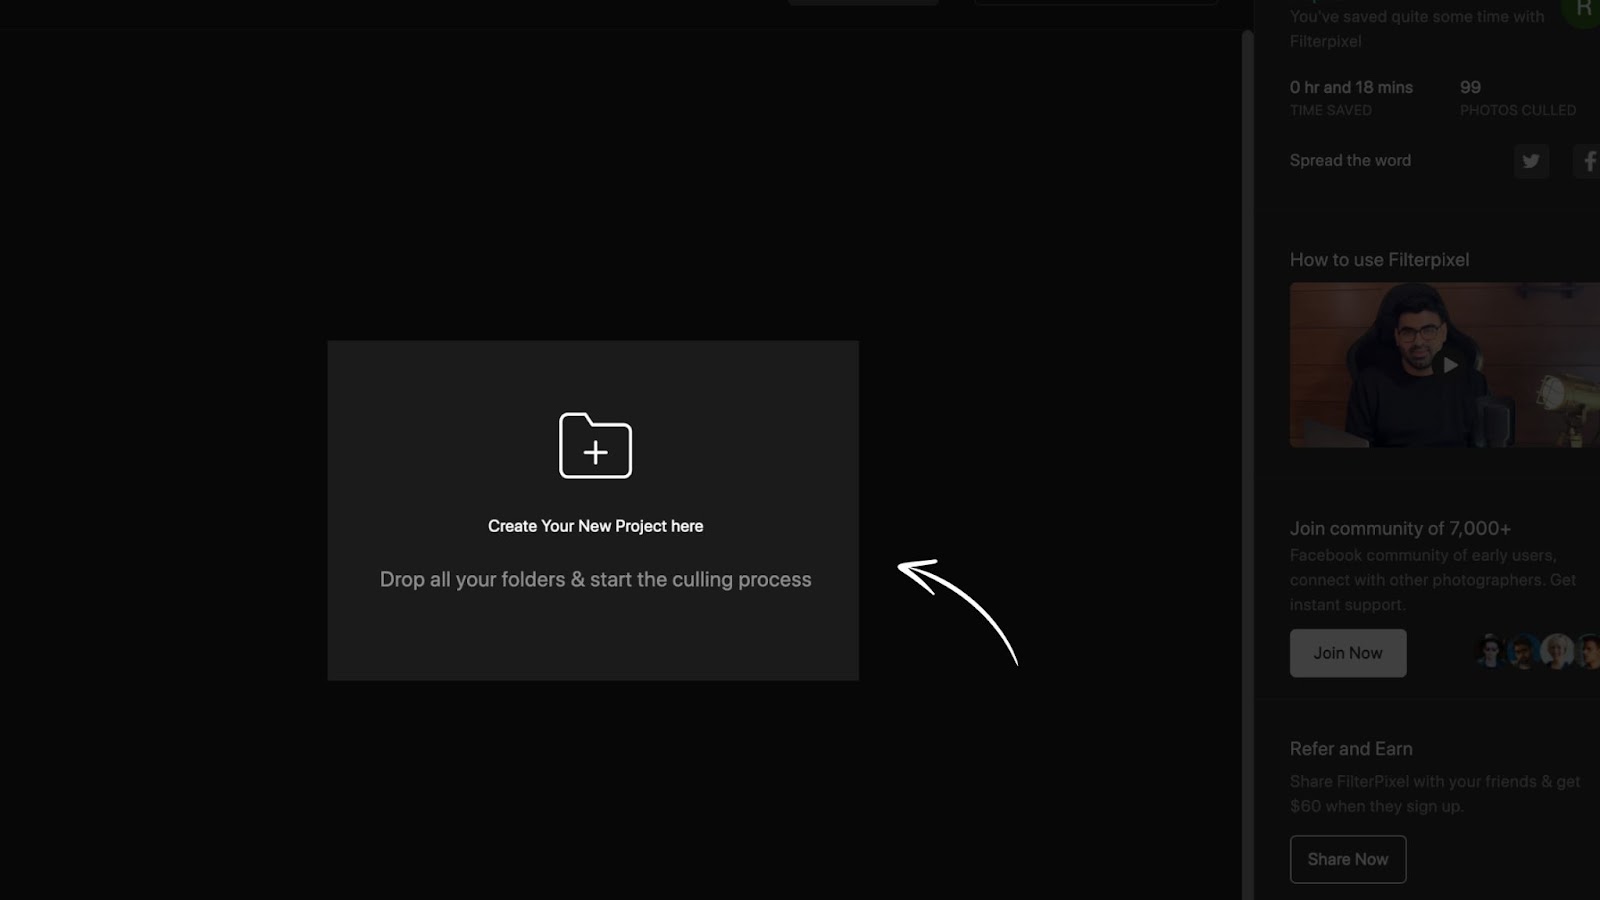
After login, You can drop the folder containing your RAW files here. After you drop the folder, you will see the following screen to write a project name and choose the type of shoot. Name your Project: My project name can be, Mary-John 2021/01/ Wedding and the type of shoot and click Start Now Button.
Tips for choosing the type of shoot:
- If you take your selection decisions on eye quality, use Portraits.
- If you want AI to check aesthetics, use Weddings/Events/Family Portraits.
- If you have photos with fast movement choose Sports.
- In all other cases, use Others.
To sum up:
- Drop the folder containing your RAW files into FilterPixel.
- Name your project and choose the type of shoot (e.g., Portraits, Weddings/Events, Sports, Others).
- Click "Start Now" to begin.
Culling & Customised Settings
Import Speed: Instantaneous (0 second waiting time!)
Culling Time (varies based on number of photos ): 1 to 20 minutes
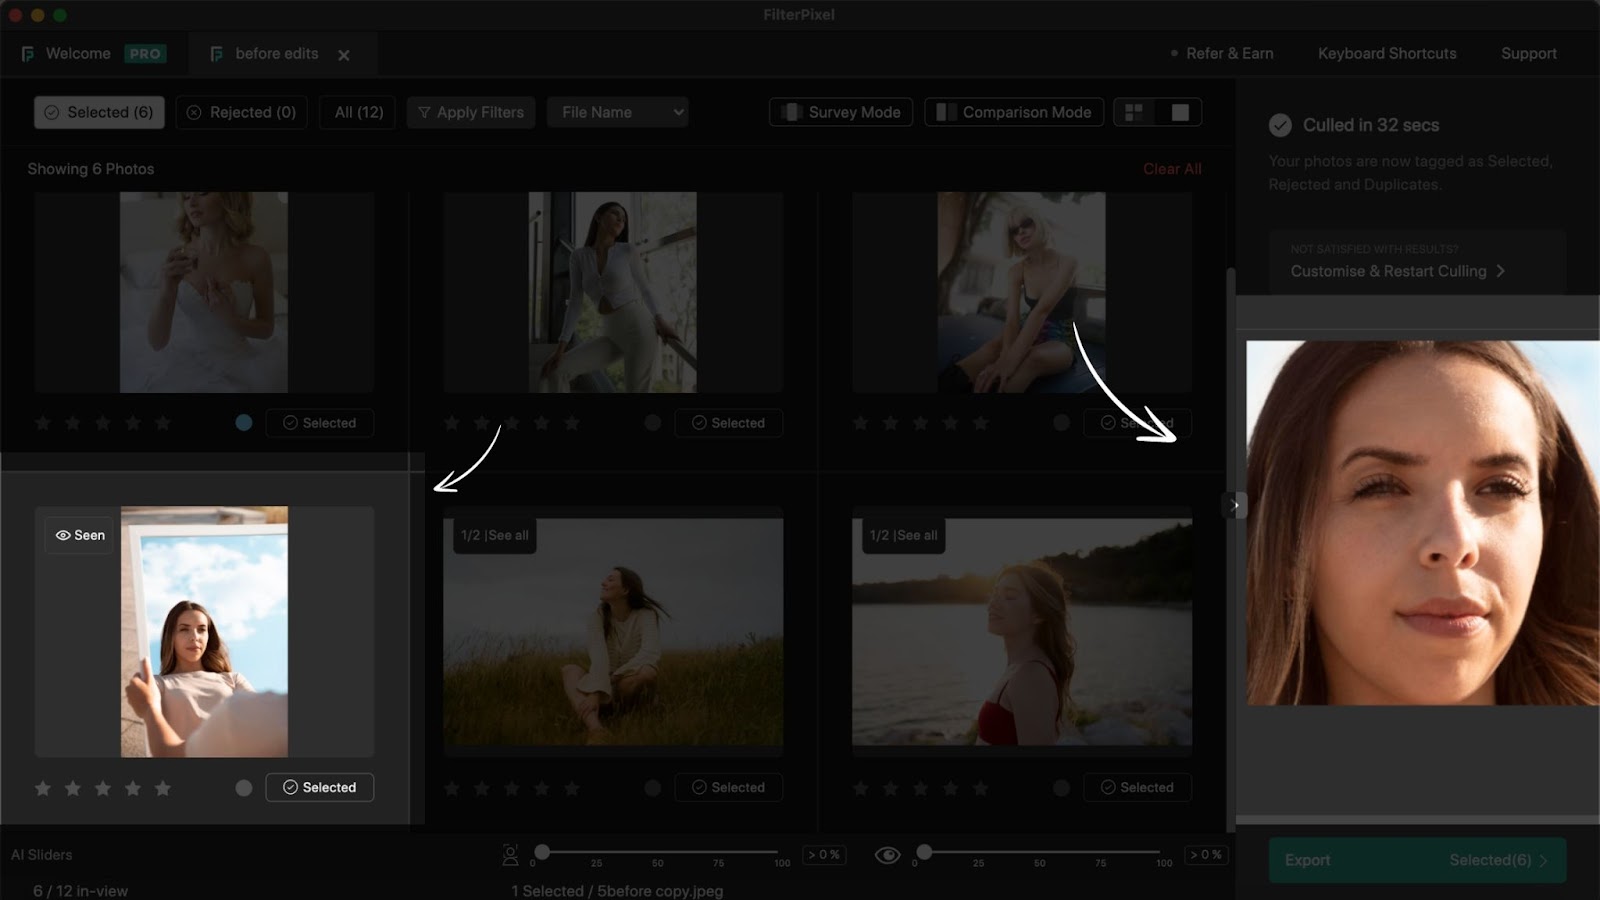
Forget about waiting to import photos – FilterPixel operates differently. Our previews are generated directly on your device's RAM, without cluttering your storage with excess cache. Once you import, our culling process kicks off automatically, typically taking 1-20 minutes, depending on number of photos Following culling, your photos are neatly categorized into three views:
- Selected view: Explore your top-notch photos, ready for final selection.
- Rejected view: Quickly spot photos with issues like out-of-focus eyes and blurry faces,
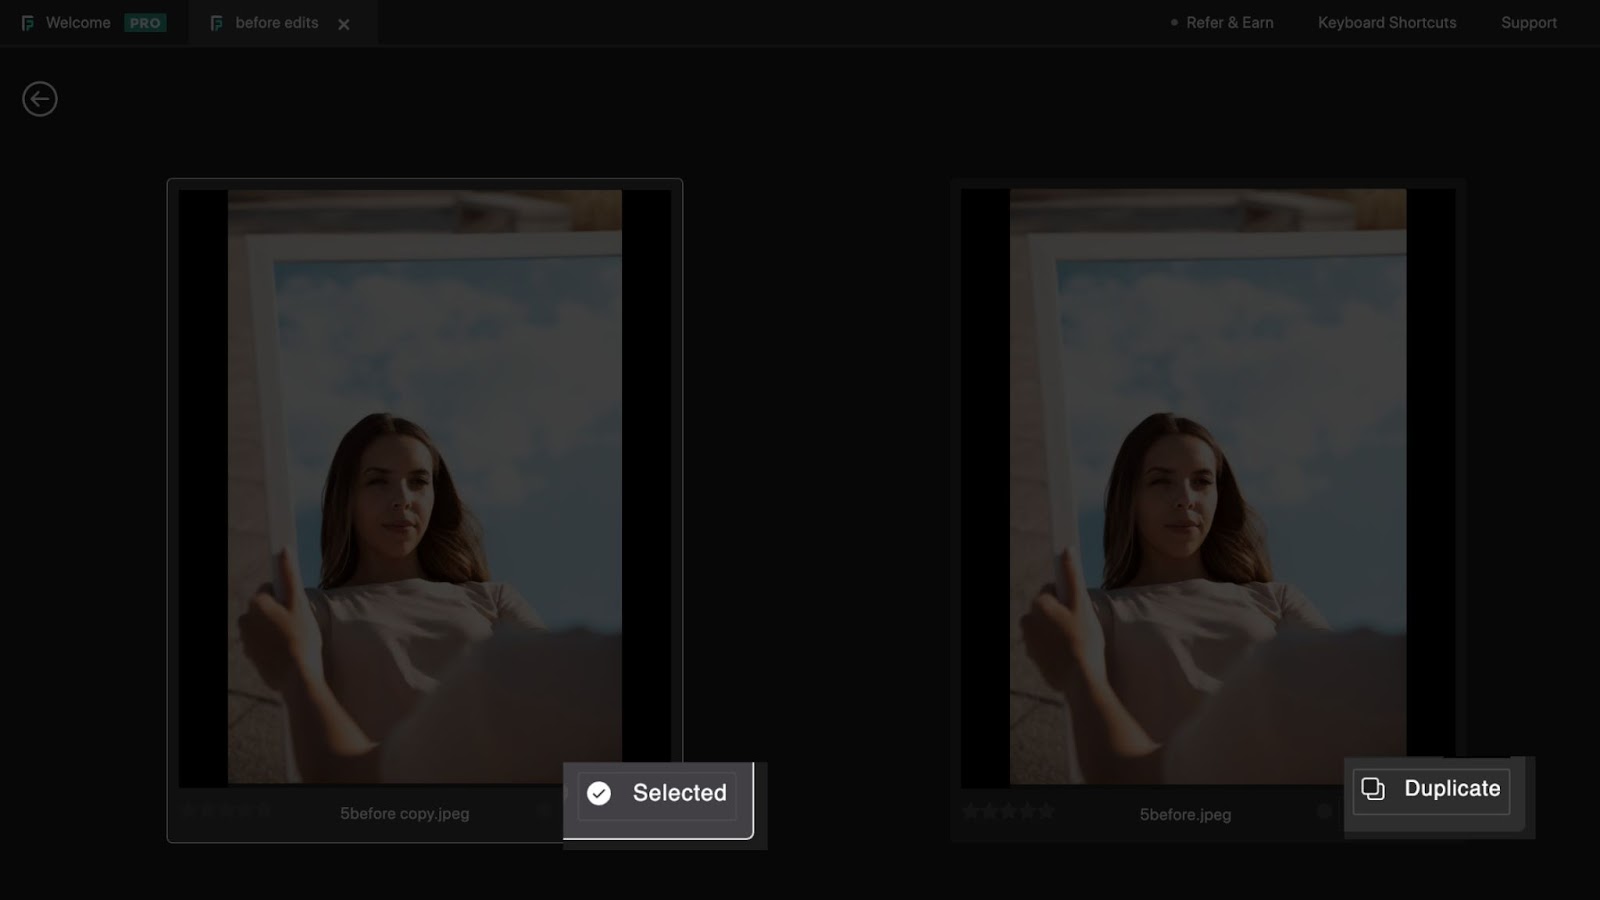
- Duplicate view: Easily identify multiple shots of the same scene or pose, allowing you to pick the perfect shot.
Want to tweak the AI’s result? Keyboard Shortcuts:
- Press 'P' to select/pick a photo.
- Press 'X' to flag/reject a photo.
- Press 'U' to tag duplicates.
With FilterPixel, each photo is represented by distinct icons, streamlining your selection process. Also, easily restart the culling process by customizing the preferences:

You can always customise your selection criteria, and redo the culling process:
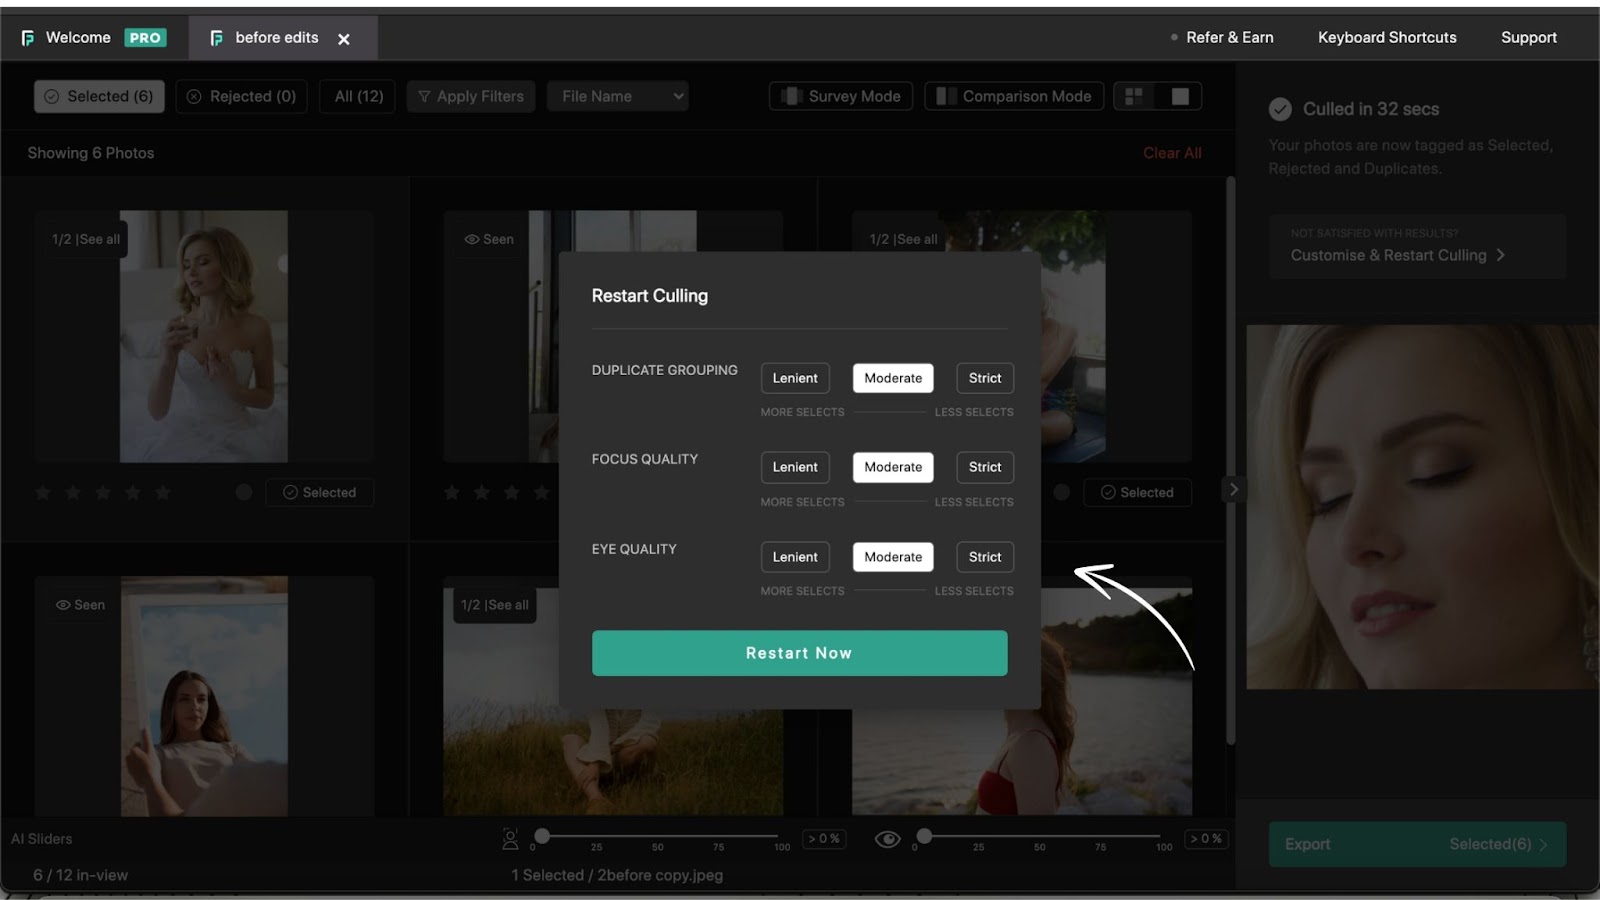
To sum up:
- Importing: FilterPixel generates previews on the RAM of your machine, eliminating the need for extra cache storage.
- Culling Process: Automatically categorizes photos into duplicates, rejects, and selected.
- Keyboard Shortcuts: Use shortcuts (P to accept, X to reject, U to tag duplicate) for efficient culling.
Now let’s dive into the advanced process of culling (helpful for photographers who work with thousands of photos at a time, and might have so many duplicate shots). Utilize our Survey and Comparison Mode for efficient review:
Survey Mode
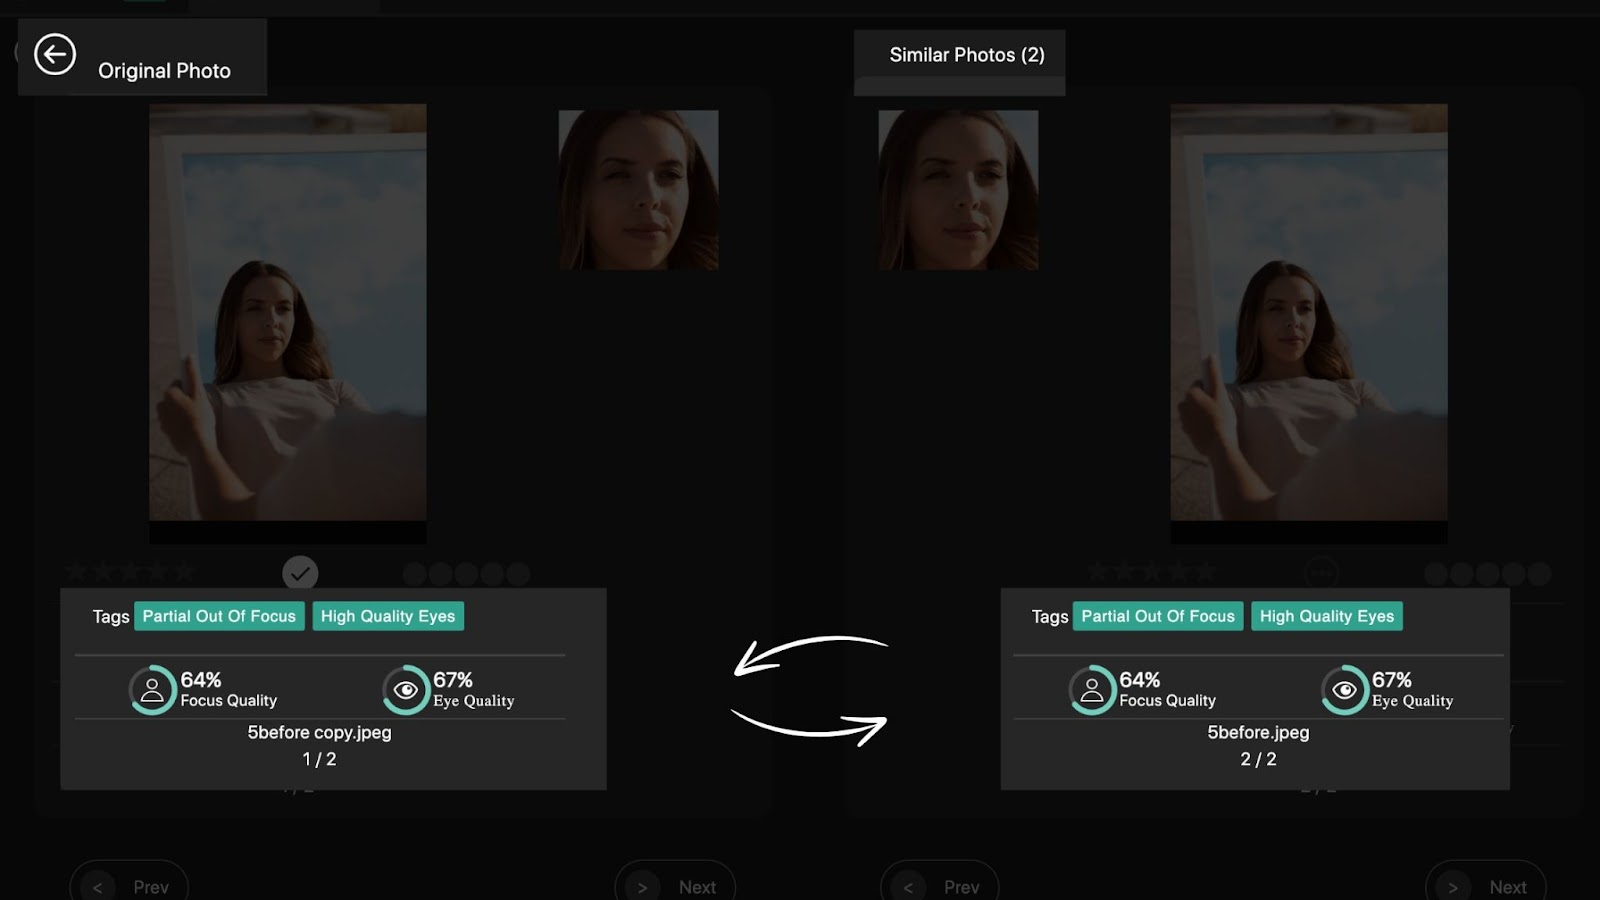
Effortlessly sift through duplicate photos using Survey Mode. Simply click on the See All icon on the top left of the or use the shortcut key S to access it. This mode allows you to view multiple duplicates simultaneously. Need a closer look? Double-click on an image to zoom in, with all others following suit for easy side-by-side comparison. Plus, once you've reviewed a set, FilterPixel marks it with a seen icon for your convenience.
To sum up:
- Quickly review duplicate photos.
- Compare multiple photos side by side for easy selection.
- Identify reviewed sets with a 'seen' icon.
Face Views
This feature allows you to conveniently inspect the faces of your subjects in photos without needing to zoom in. Whether you're analyzing facial expressions, studying features, or simply ensuring the quality of your photos.
Comparison Mode
Easily assess faces while reviewing. If a face doesn't meet your standards, hit X to reject the photo. If it's a keeper, simply move on to the next image. Also, compare the focus quality and eye quality for the best shot to be selected.
To sum up:
- Evaluate and reject photos based on facial expressions.
- Streamline the reviewing process for efficiency.
Keyboard Shortcuts and Rating Systems
FilterPixel offers familiar features like color and star ratings akin to Lightroom. You're in control with manual star and rating adjustments. Need shortcuts?
Pro Tip: Press Cmd+K or Ctrl+K for a comprehensive list. Here's a quick rundown:
- Stars: Use 1-5 to rate images.
- Colors: Employ 6-9 to apply color tags.
- Clear ratings: Reset with '0' or (⌘Command) + 0 on Mac, and Ctrl + 0 on Windows.
- Purple Color: Access it easily with Ctrl/(⌘Command) + 9.
With FilterPixel, your culling process is not only efficient but also tailored to your preferences, making photo management as easy as we can.
To sum up:
- Color & Ratings: Assign stars and colors to photos for organization.
- Shortcut List: Access a complete list of shortcuts within FilterPixel for quick navigation.
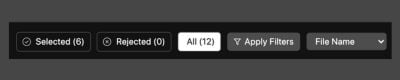
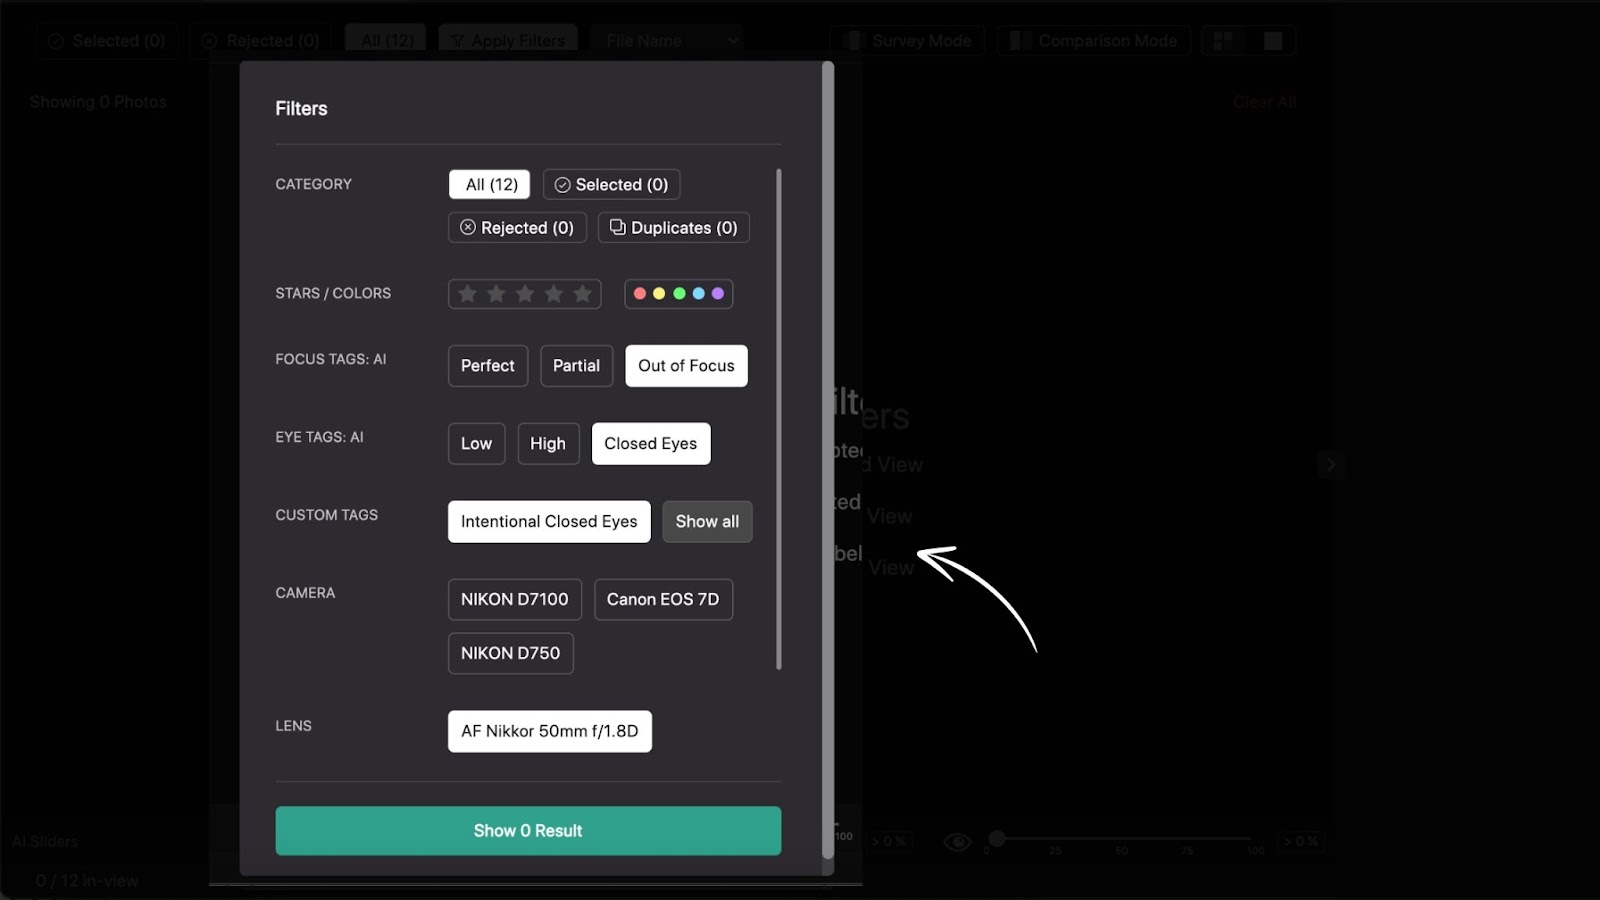
Advance Filters
The "Apply Filters" feature enhances image sorting by offering tools such as lens and camera filters, custom tags, eye and focus tags, category selection, and star/color ratings.
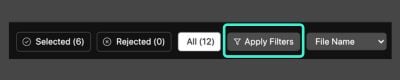
These tools help users efficiently navigate through large image collections, categorize them based on specific criteria, and prioritize them according to importance or relevance. Overall, Advanced Filters streamline the sorting process, making image management more organized and productive.
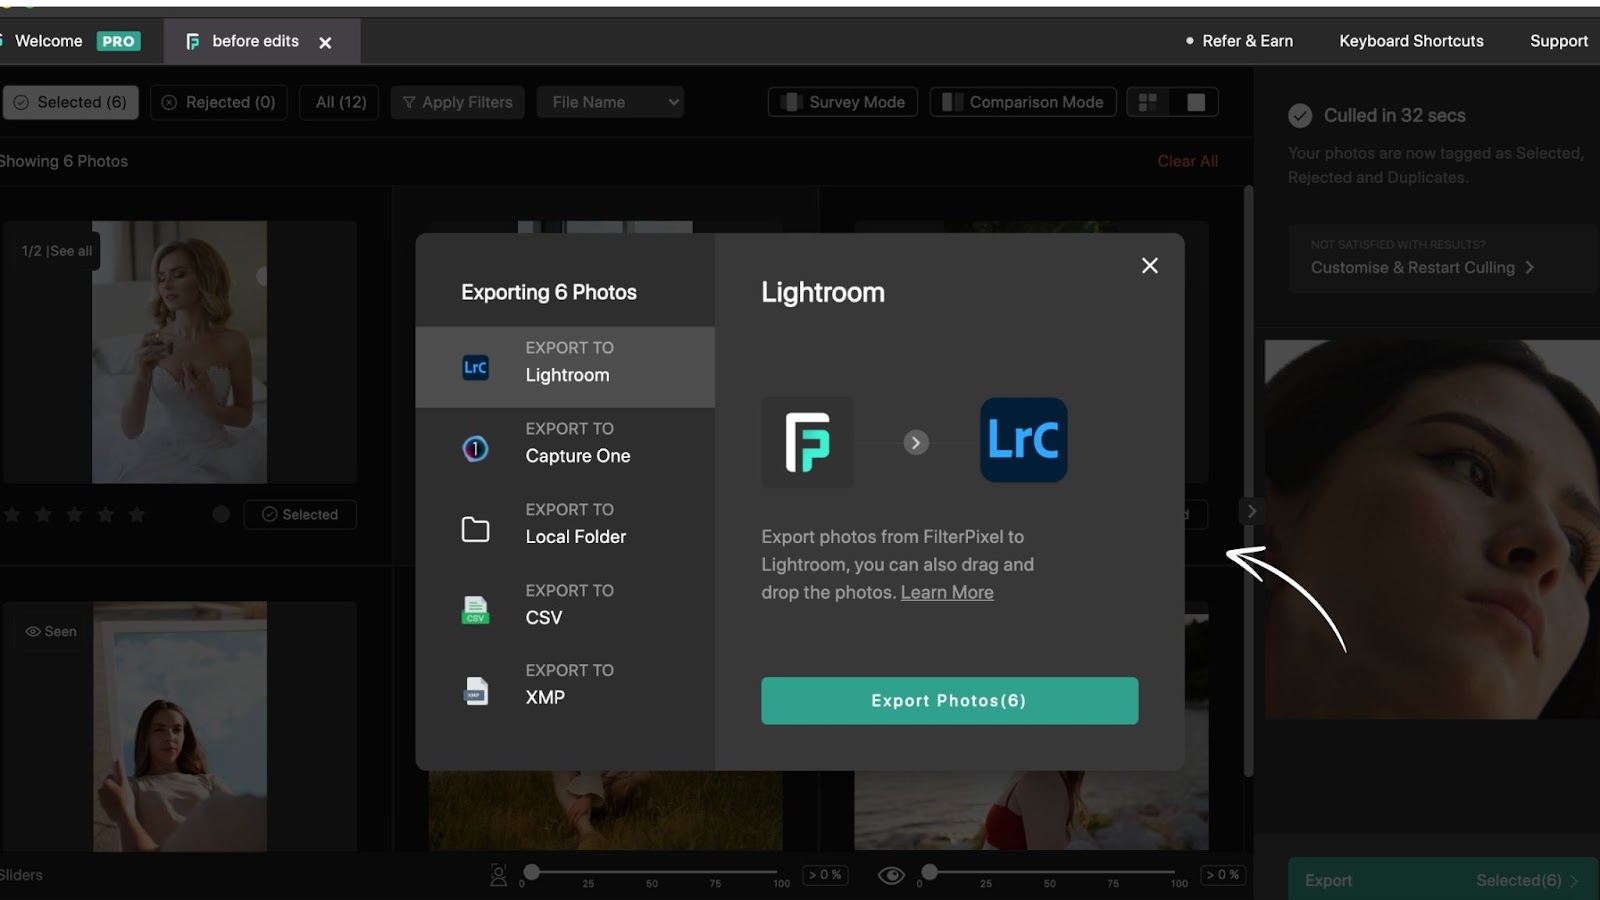
Exporting to Local Folder, Lightroom, or XMP
After the culling, you can easily export your selected images in your preferred way.
You can export your images to Lightroom, Capture One, local folder, XMP or even in CSV format.
To sum up:
- Export photos to Lightroom, CSV, XMP, or local drive for further editing.
- Seamlessly transfer photos to other editing software for post-production work.
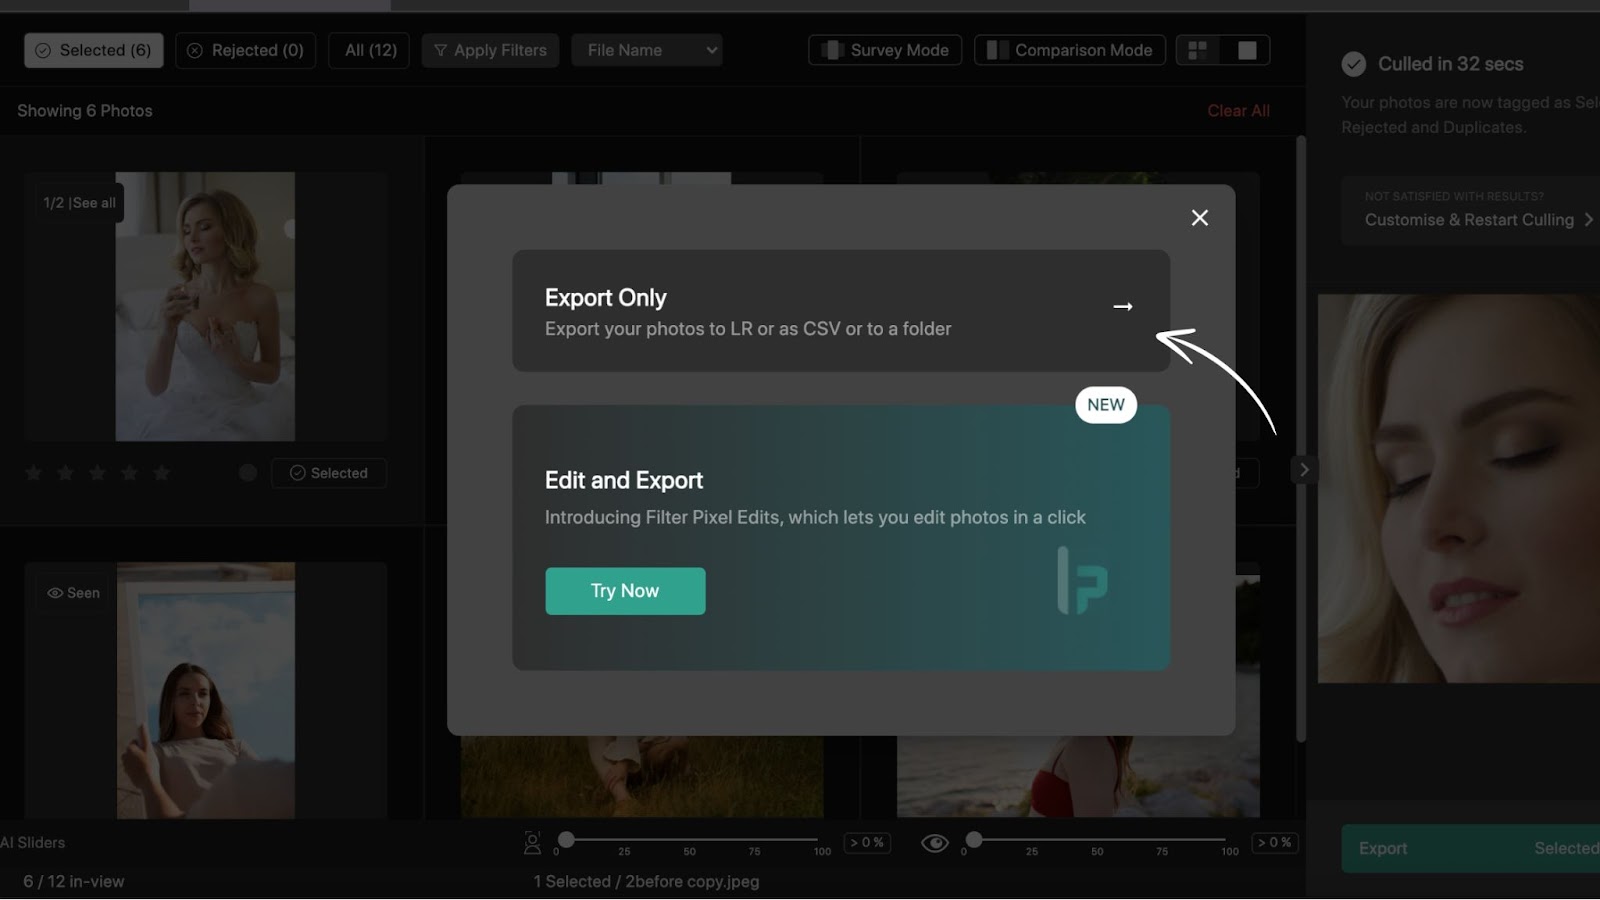
Using Edit & Export
As you all know now FilterPixel lets you edit your pictures seamlessly with AI. All you have to do is click on Edit and Export . It will instantly open the FilterPixel Edits and you can choose your preferred editing style. You can choose to edit with your own trained AI profile or use the expert profiles. To know more, keep reading.
Using Expert Profiles
FilterPixel has many expert editing profiles, according to your genre of shoot, choose the one that would bring the best output on the table.
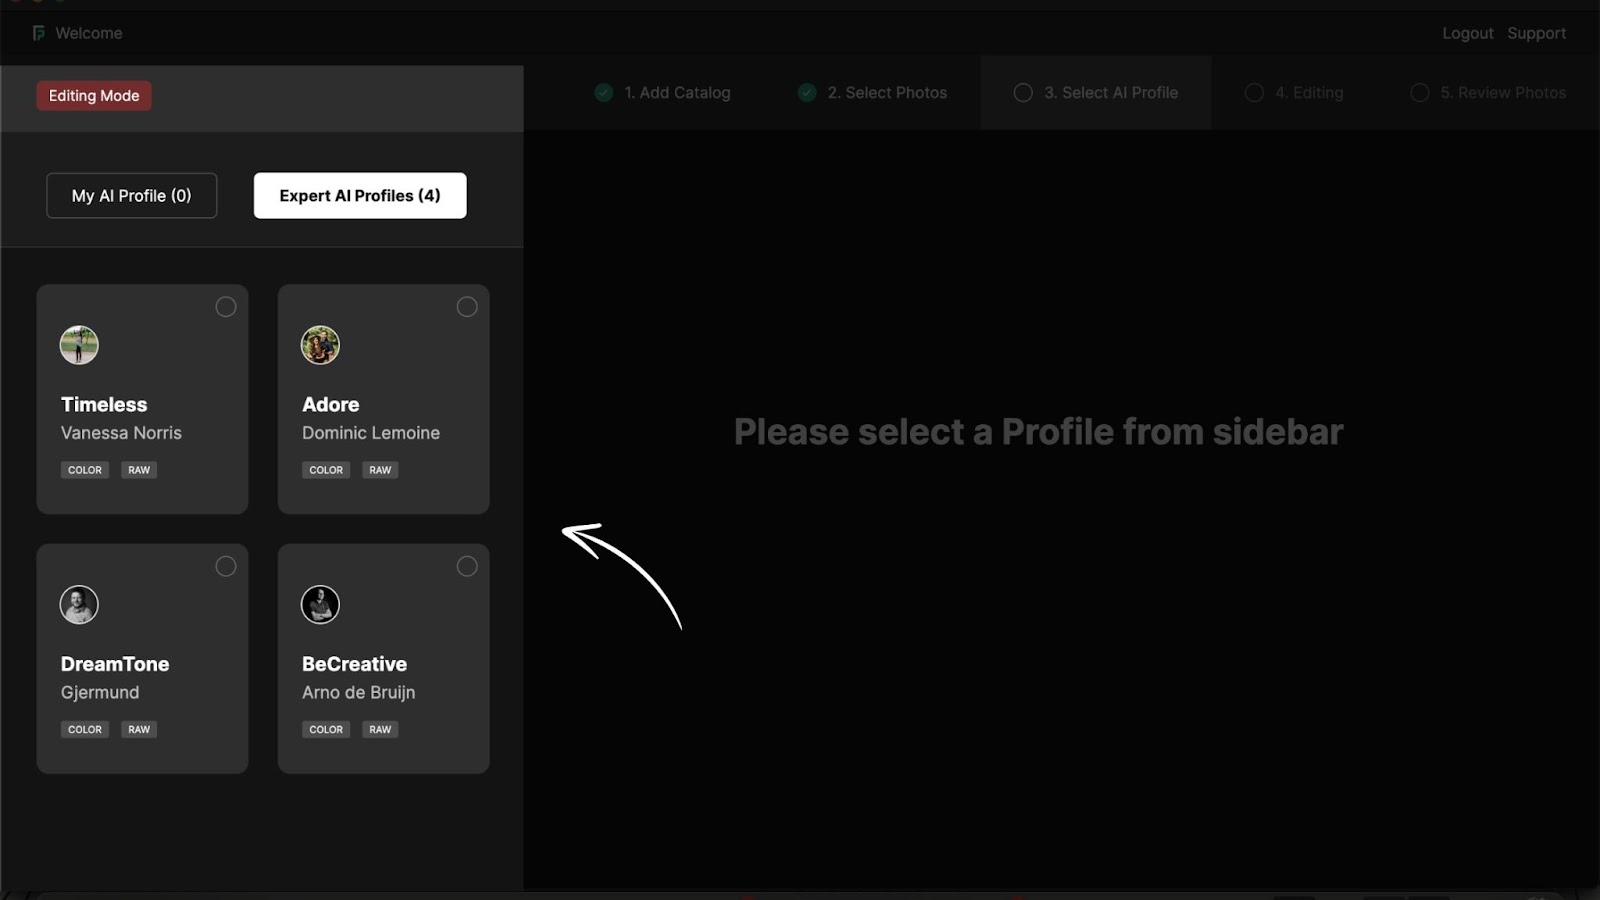
After selecting the profile, carry on to edit just by clicking the right size down button and voila!
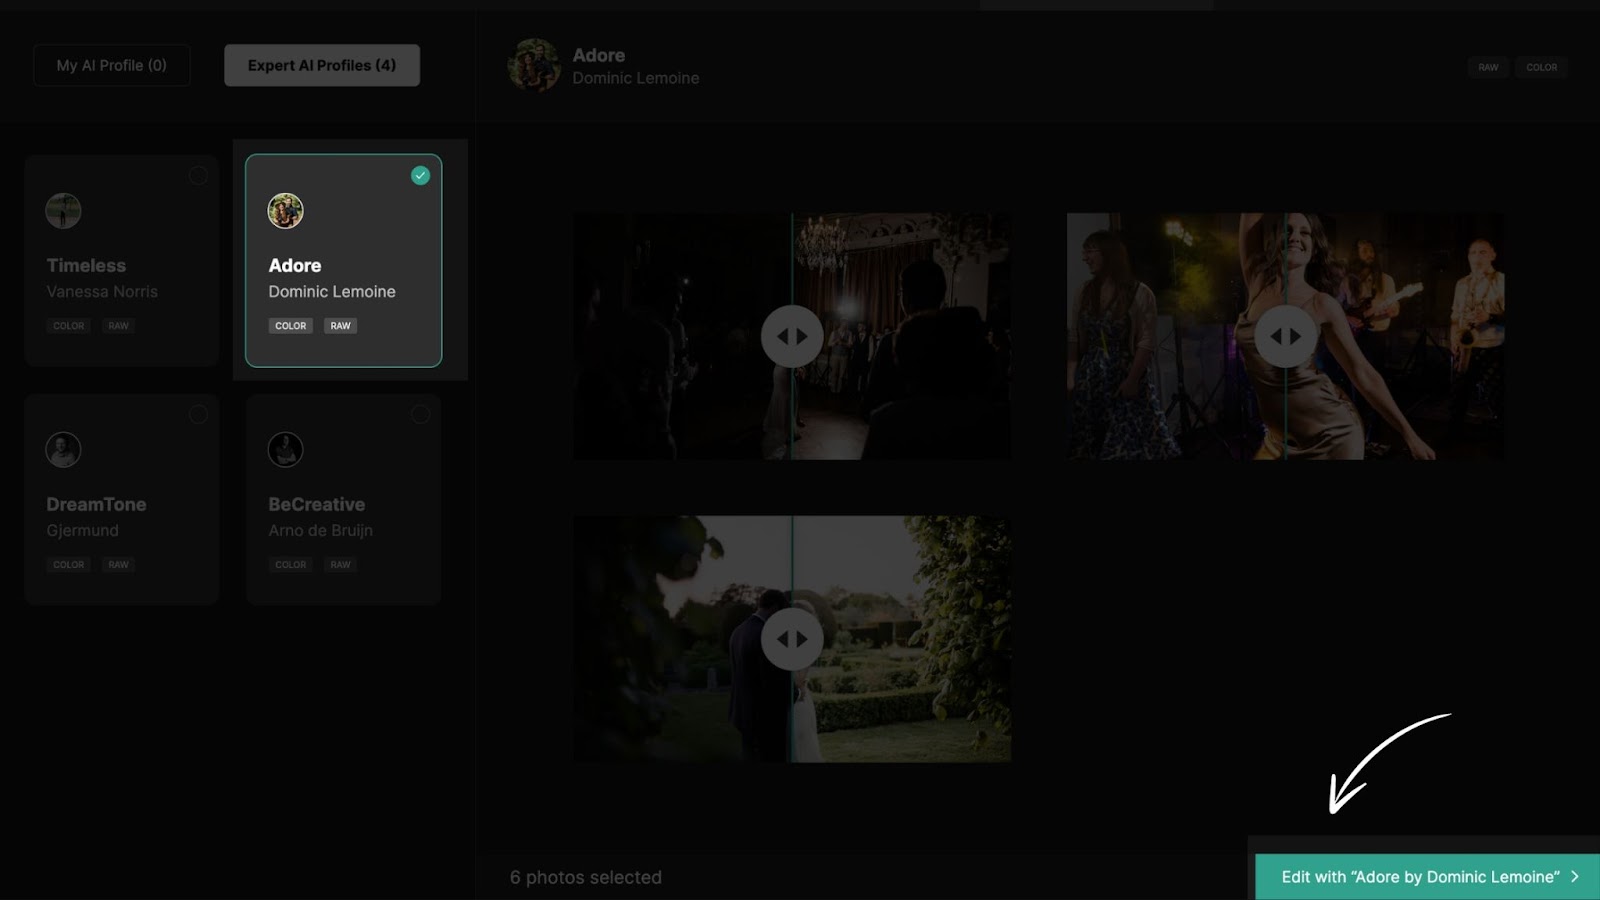
Here is an example of before and after using the expert AI editing profiles:


Creating Your Own AI Profile
You can also choose the My AI Profile and train your AI assistant by submitting your Lightroom catalogue with 3000 Edited RAW files. Your AI profile will be ready to use within 24 hours! And slowly with every use it will adapt and improve more and more.
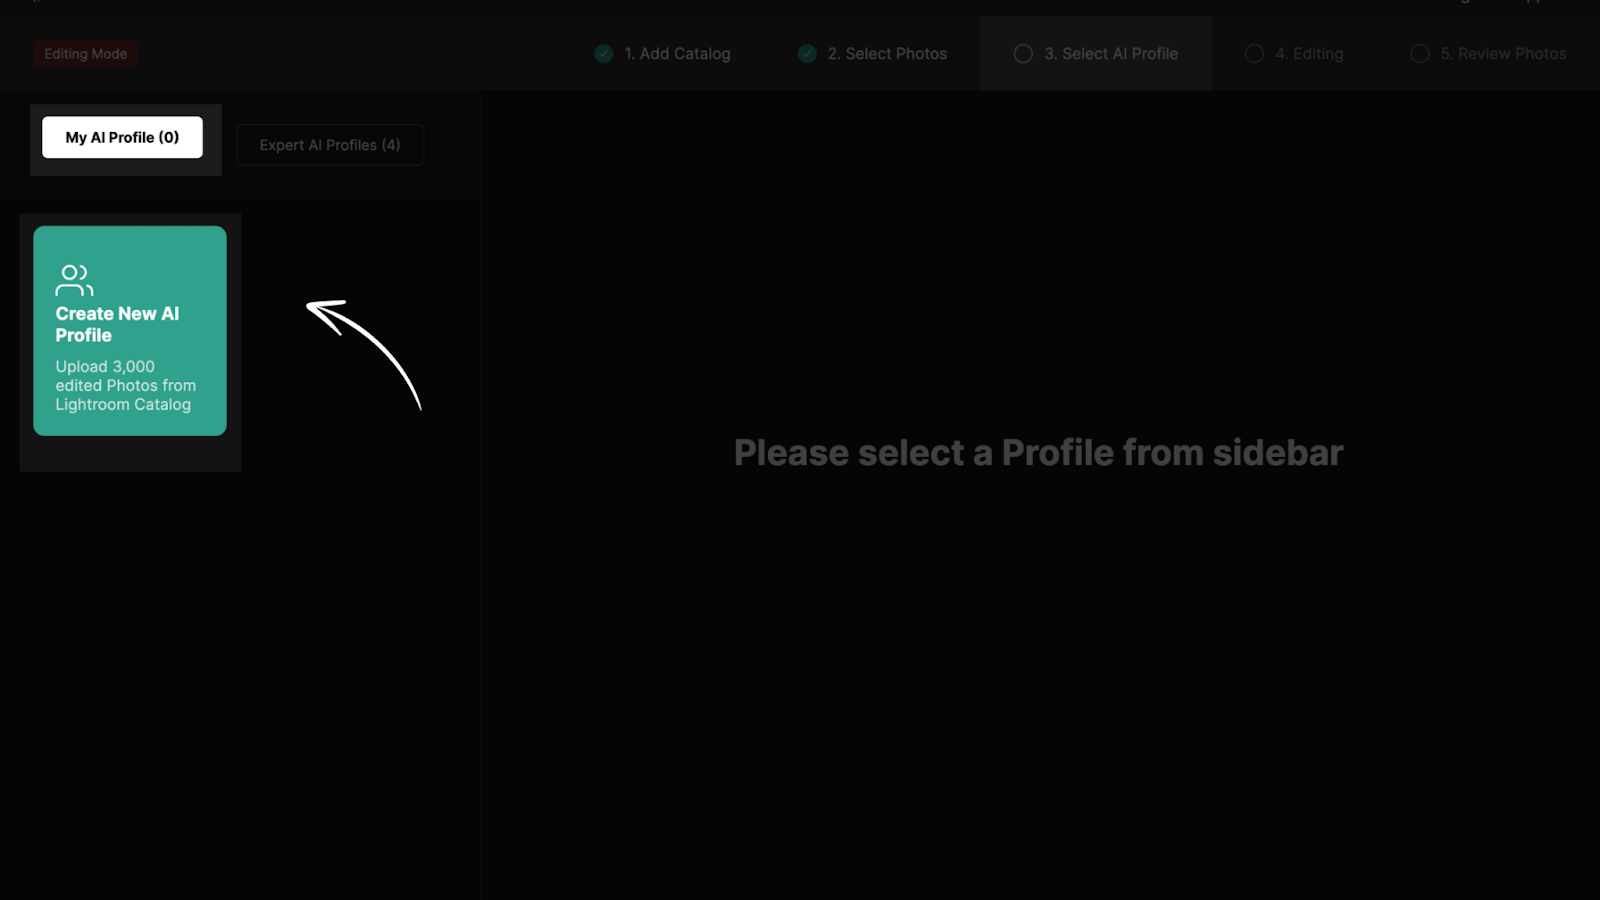
Now drop the catalogue and fill out the details.

To sum up:
- Train your AI assistant by submitting your Lightroom catalog with 3000 edited RAW files.
- Personalise your editing experience with a custom AI profile or choose from expert profiles.
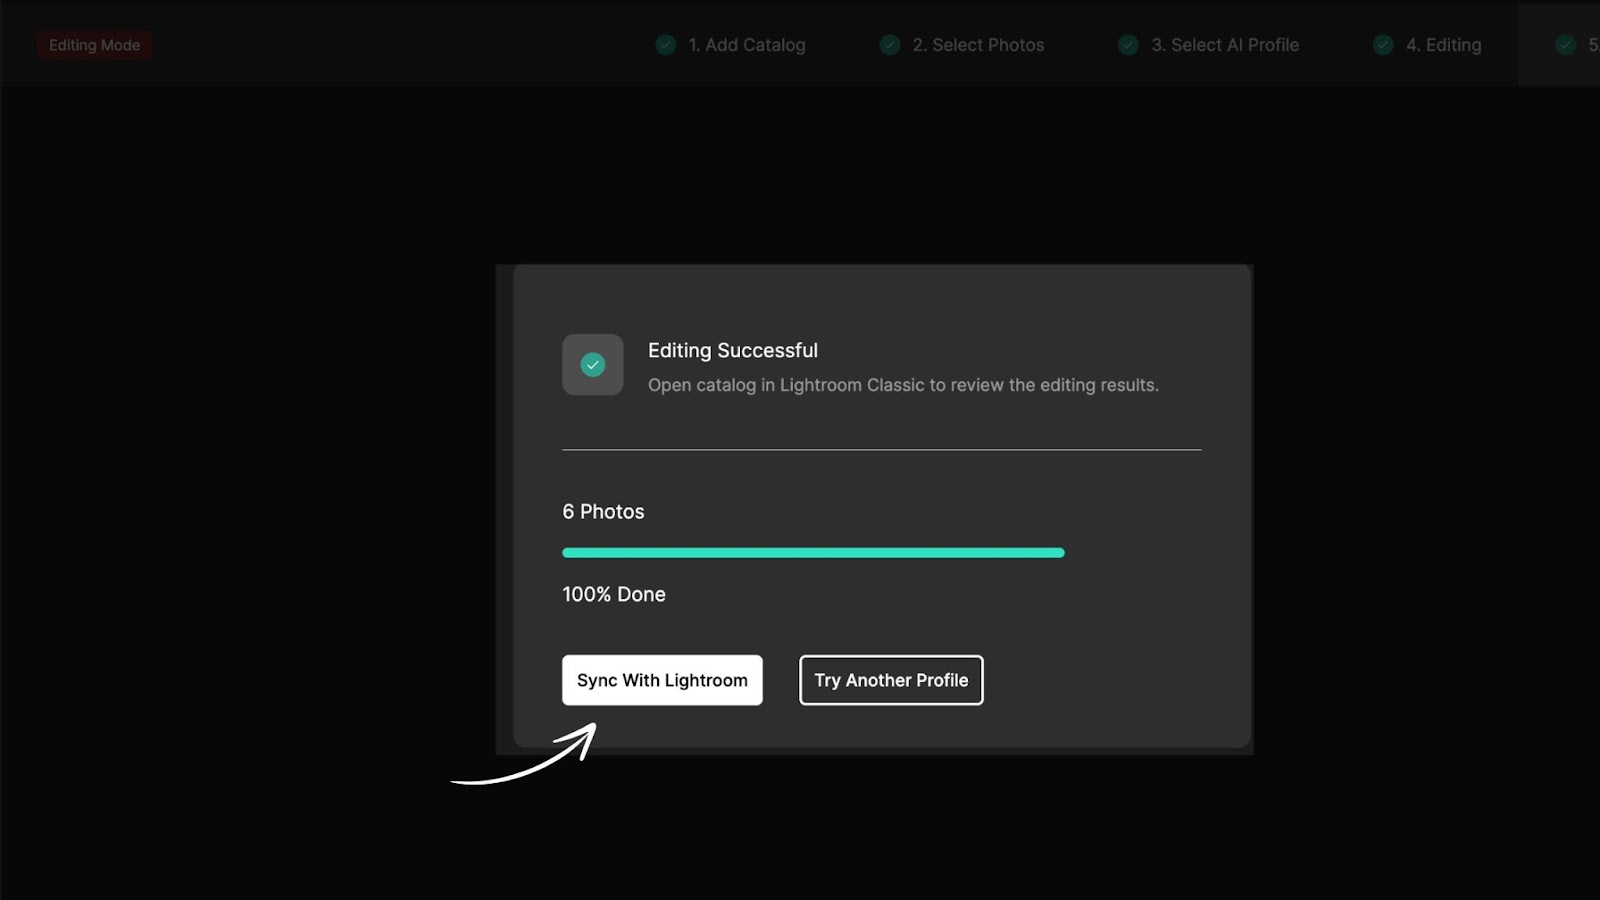
Reviewing in Lightroom
Now select Sync With Lightroom to preview your edited pictures seamlessly!
Final words
I hope the above tutorial will help you create a workflow around FilterPixel & help you to cull & edit easier, smarter, and faster. If you have any doubts or queries, you can reach out to our support team via email at accounts@filterpixel.com and we will get back to you in no time. Have a great time with FilterPixel.
-Jun-19-2026-12-08-11-9138-PM.png)
-2.png)