


A photography session is composed of the best shots, good shots & bad shots. Bad shots are not hard to spot but difficult to find. To remove all these out-of-focus, blurry, closed eyes photos, we often have to go through all the photos of our session once or sometimes twice.
But are these technical errors worth giving attention to? Shouldn’t we be focusing on our best photos which are worth our editing time? If you agree, then you should definitely check how smart panels in Filterpixel work.
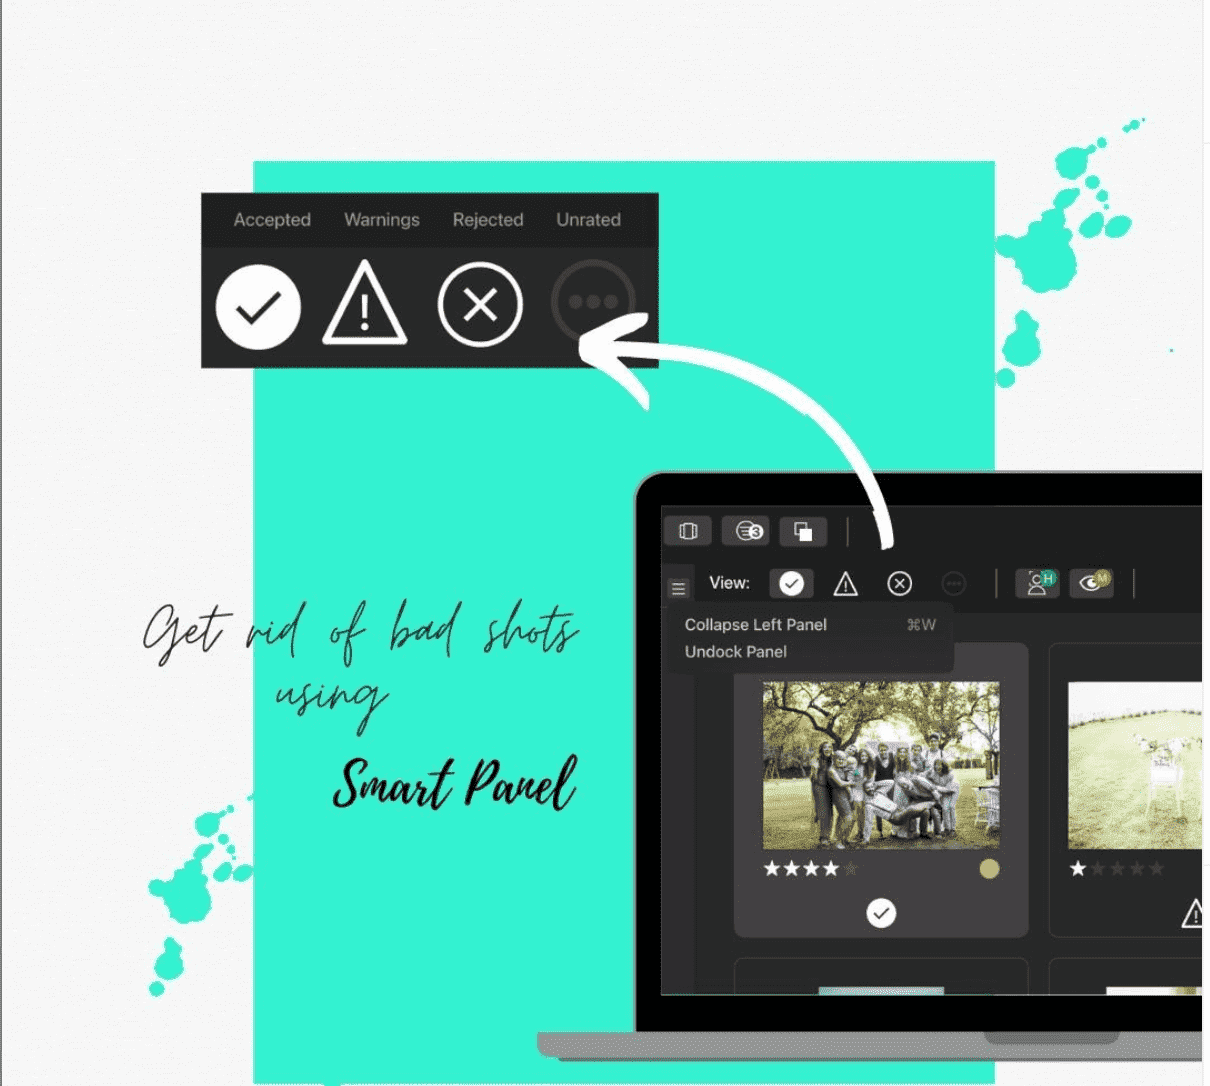
Introducing Smart Panel

Smart Panel is the fixed-top bar in the FilterPixel app that automatically classifies your photos into “Rejected”, “Unlabelled” & “Accepted” Views.
When you import RAW Files, the AI automatically detects important subjects & checks the focus quality & eye quality of your photos, and puts them into Unlabelled or Rejected views.
Let’s understand what is meant by these views present on the Smart Panel:
1. Unlabelled: The photos without any technical glitches are inside the Unlabelled View.
2. Rejected: The photos with major focus quality or major eye quality issues are inside the ‘Rejected’ View. You should spend the least amount of energy inside this View.
3. Accepted: This View is empty by default as FilterPixel does not accept any images unless you click on the Auto-select button, or accept them manually.
You can accept any image by pressing “P” on the keyboard & it goes to your ‘Accepted’ View.
Ratings & Stars

The Ratings & Star in FilterPixel just work like Lightroom. You can star rate any image or colour rate them according to your need. The only difference is that the entire experience will be faster.
Keyboard Shortcuts for the smart panel:
- Press “X” to move an image into rejected view
- Press “P” to move an image into the accepted view
- Press “U” to move an image into the unrated view
- Press 1,2,3,4,5 to Star Rate
- Press 6,7,8,9 and Ctrl + 9 to Color Rate Images
Conclusion
Now, you can use the smart panel and spend your time only on the images that are worth spending time on.
Hope you enjoyed our smart panel tutorial of FilterPixel. To learn more about how to use filterpixel, check out our guide on how to use FilterPixel?
So, what are you waiting for?
Save Time for your family & business, cull with Filterpixel now.
.png)