Imagine coming from a shoot & having thousands of images in front of you to cull. Most of them can be duplicated or similar images. You can’t keep all of them. At the same time, you can’t cull all of them as well.
The problem comes when you have more than two similar photos, selecting one out of them. Going back and forth through photos when they all look almost the same put us in the analysis paralysis zone.
Analysis Paralysis is one of the reasons why your culling efficiency plummets.
In the last post, you have seen how you can use autoselect & let the AI select the best photos for you – also known as a cull-out workflow. But, in some cases, you might want AI to tag the bad ones so that you can quickly go through the remaining & pick what suits best to your story.
The above is called Cull-In workflow, and the cull-in workflow provides you maximum flexibility over the decision-making process. Still, it can have additional analysis-paralysis to your decision-making.
How FilterPixel Autogroup avoids analysis paralysis?
Analysis paralysis can happen when you have a lot of choices in front of you, which makes you unable to decide—for example, going back and forth over a similar photo and asking yourself which is better while both are almost the same.
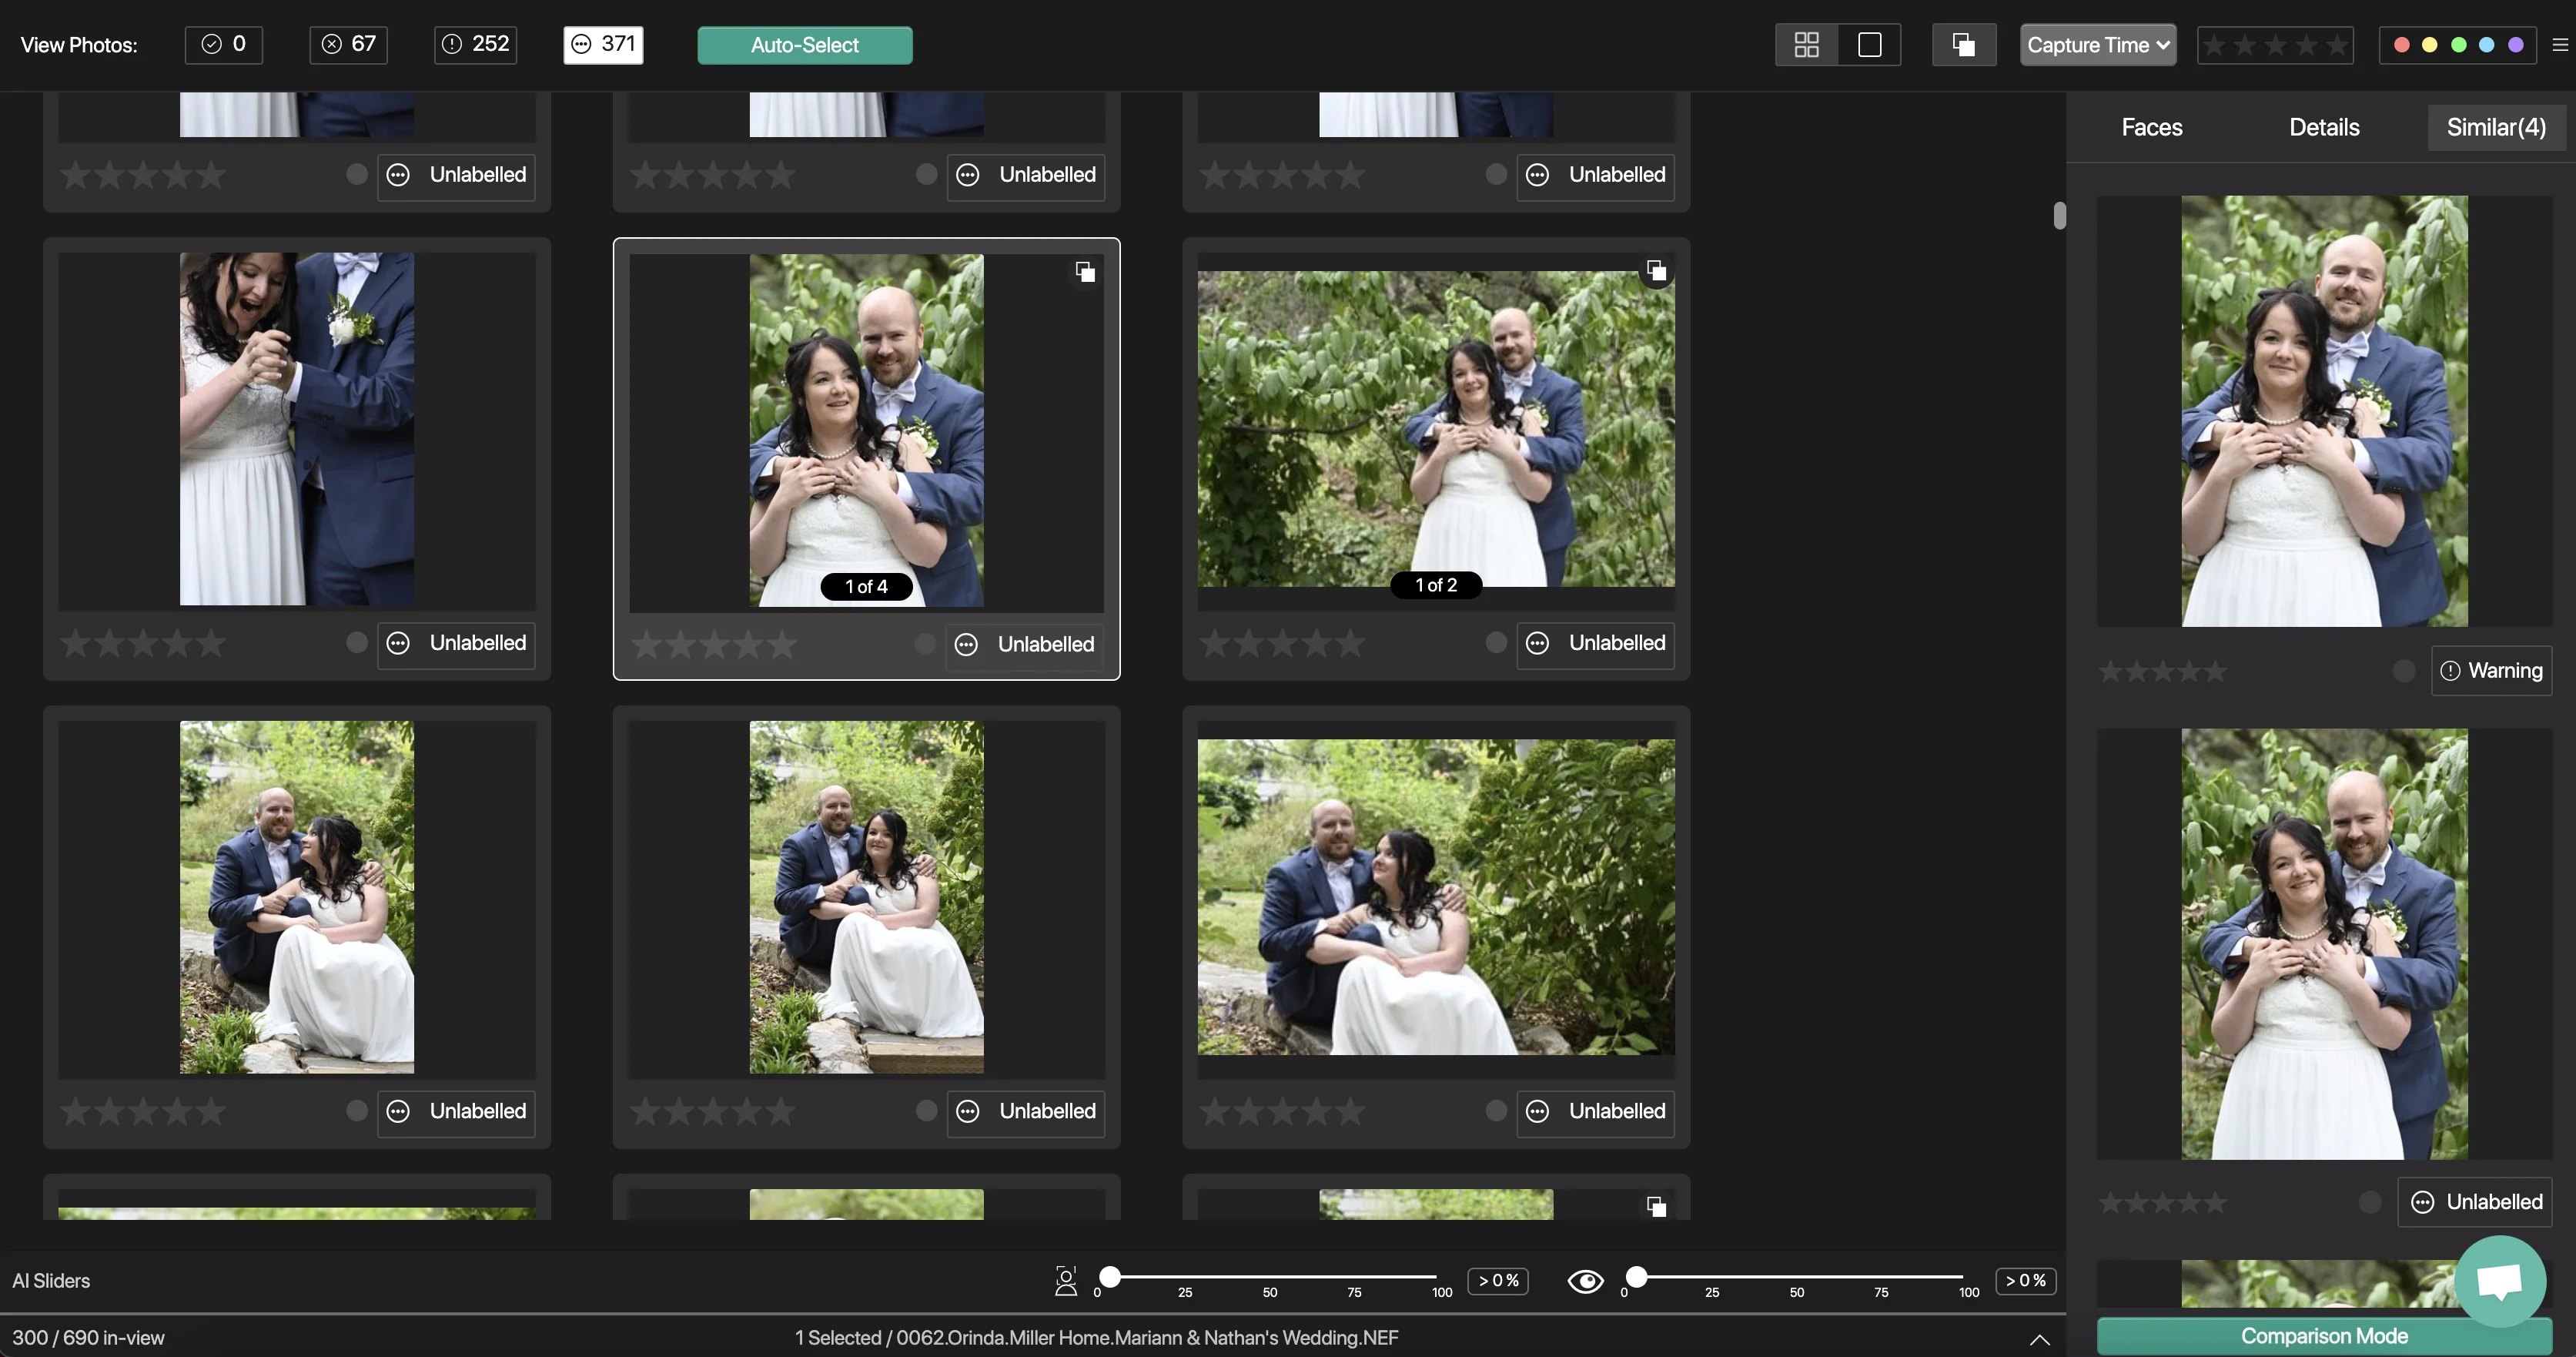
First, in FilterPixel, the AI automatically tags all good photos as unlabelled. Then by clicking Autogroup, you can group all similar images in a stack of cards & can organize all of your good pictures in the grid.

How to select from a set of similar shots?
Here are three steps you should follow to cull your duplicate or similar shots quickly.
- Go to the Unlabelled view in the navigation bar ( represented as triple-dot inside a circle), which contains photos without issues.
- Click the Autogroup button in the navigation bar.
- To pick any photo from a group of duplicates, Press P on the keyboard.
- Press Tab and skip all other photos similar to that.
Here is your hack for avoiding analysis paralysis:
When you are in Unlabelled view, you will only see the good photos. If you like it, select it and skip the entire group by pressing “Tab” on the keyboard.
No need to check the alternatives in that group.
If you don’t like it, you can see the alternatives in the grid-view, the full-screen view, or the comparison view.
You can right-click on any image and select/reject it is from a similar panel.


For 1:1 comparisons, you should use the above comparison mode.
Keyboard Shortcuts:
Comparison Mode:
1. Press C to enter comparison mode & escape to exit
You can use arrow keys to navigate & P, X, U to select, reject or unlabel on the right side photo in comparison mode and Alt/Option + P, X, U, and arrow keys for the left-hand side simultaneously.
Grid Mode:
1.By default, you are in grid mode. You can also press G to enter grid mode
2. Press P, X, U to select, reject & unlabel photos
3. Use Ctrl/Cmd + A to select all
4. Press Shift + arrow keys to select a few
How to export your final selections?
You might want to delete all other similar photos that are not selected or store them somewhere with some backup storage solutions.
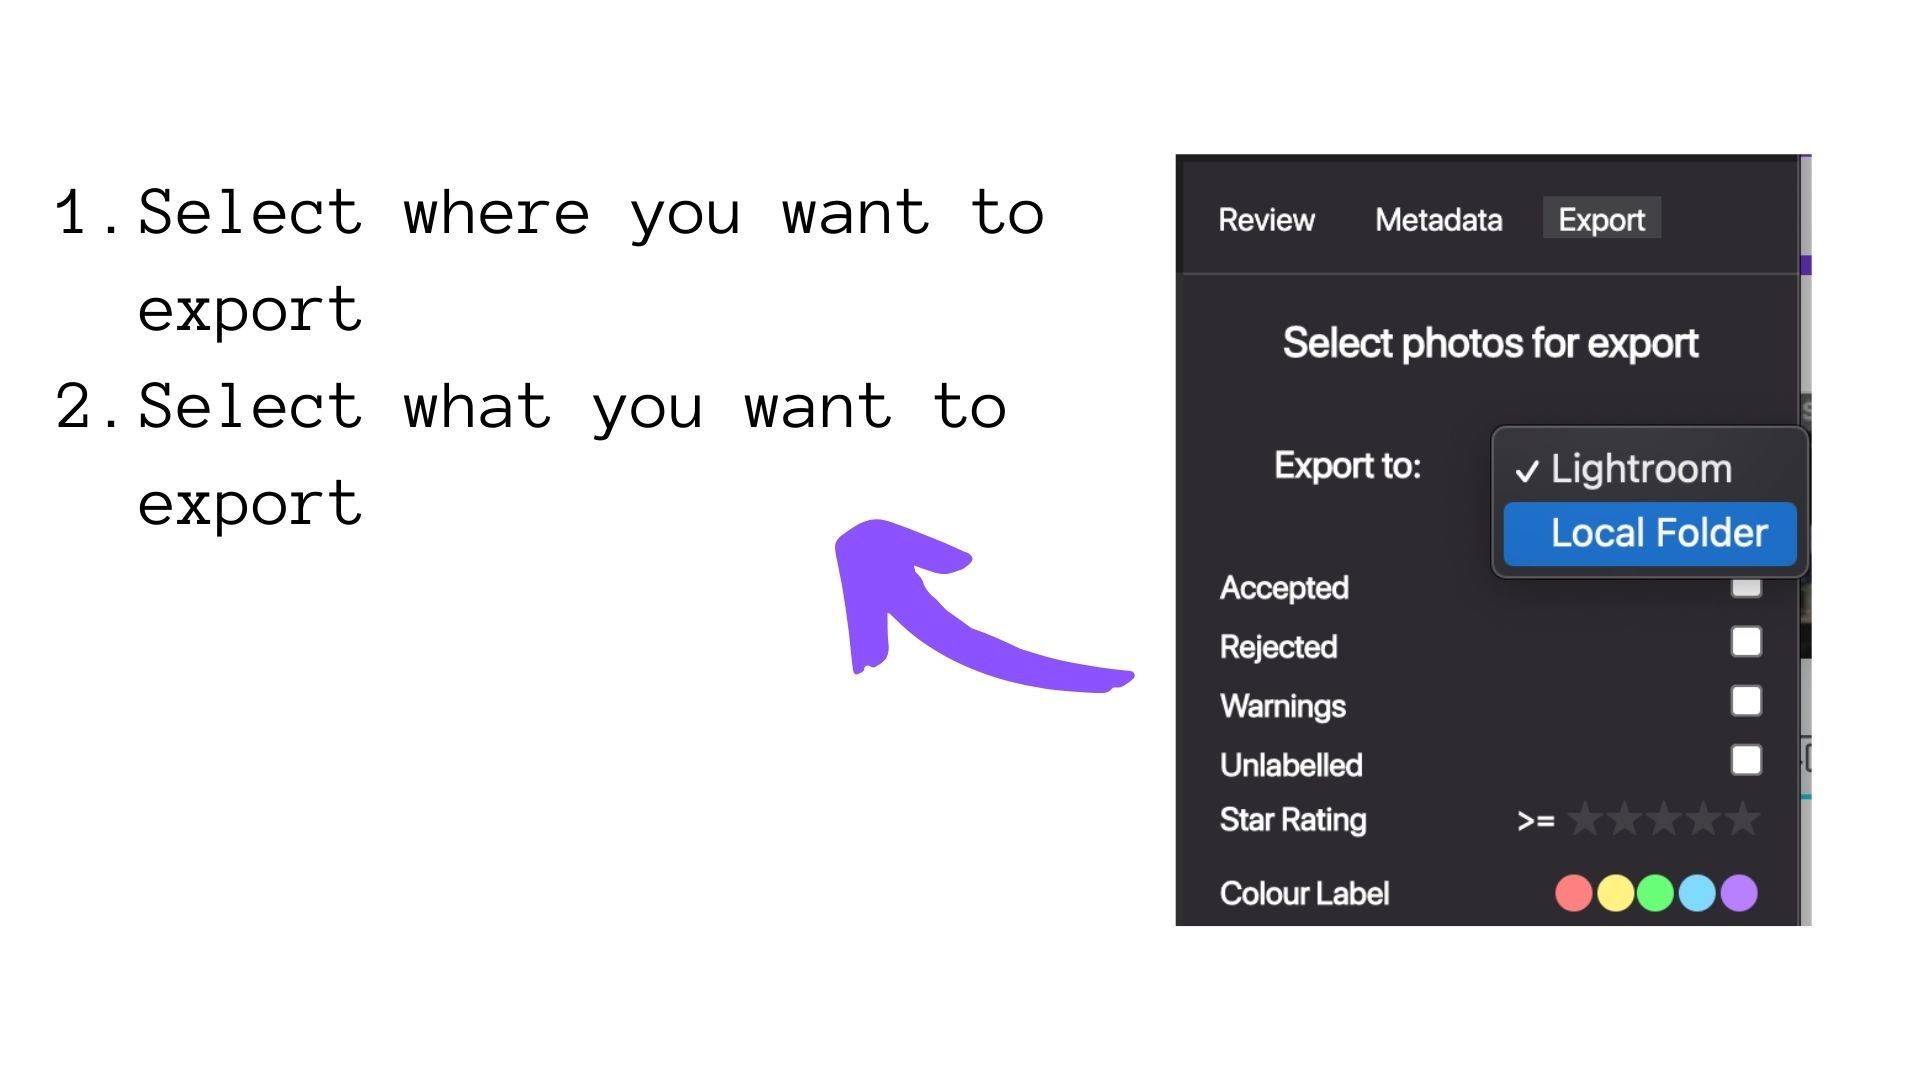
With FilterPixel, You can export your selections to Lightroom or a local hard drive on your system.
Tip: For Lightroom users, they can click export to Lightroom & can get all their selections inside Lightroom.
For Non-Lightroom users, here is how you can cull your duplicates:
1. Export all files to your hard drive by selecting Local Folder in export options, as shown below.
- Go to your imported folder directory, and you will see that FilterPixel has created a folder named FP inside it.
- Go to the folder named Accepted inside the folder named FP to see all your selected duplicates.
- Back up all other folders or delete them if you don’t want to keep different files.

Conclusion
While culling photos has become extremely easier, our weekly updates are just because of our early user community. If you want to become the first to get our updates, join us here