


Photography Workflow series: How to edit photos faster in Lightroom Classic
In the first post, we discussed how to find the best photoshoot locations and scouting options. Then we talked about the essential checklists for a photoshoot and the best backup and storage options for professional photographers followed by the best photo culling workflow.
In this post, let’s find a few tips to increase the workflow inside Lightroom Classic.
Shot thousands of photos?
FilterPixel culls them in minutes using genre-specific AI. Try DeepCull free.
To edit photos in Lightroom Classic could take many hours, especially if you have to import, cull and edit thousands of images at once.
This is where a faster workflow comes into the picture. Using shortcuts, pre-sets and quick tools to edit photos in Lightroom can save you time and energy.
Let’s see how we can do that in the below list that comprises 10 tips on how to edit photos in Lightroom faster.
1. You can begin by setting the Import options:
Under Lightroom Classic -> Preferences -> go to the Import options tab under the General tab, and check the box that says “Show import dialogue when a memory card is detected”
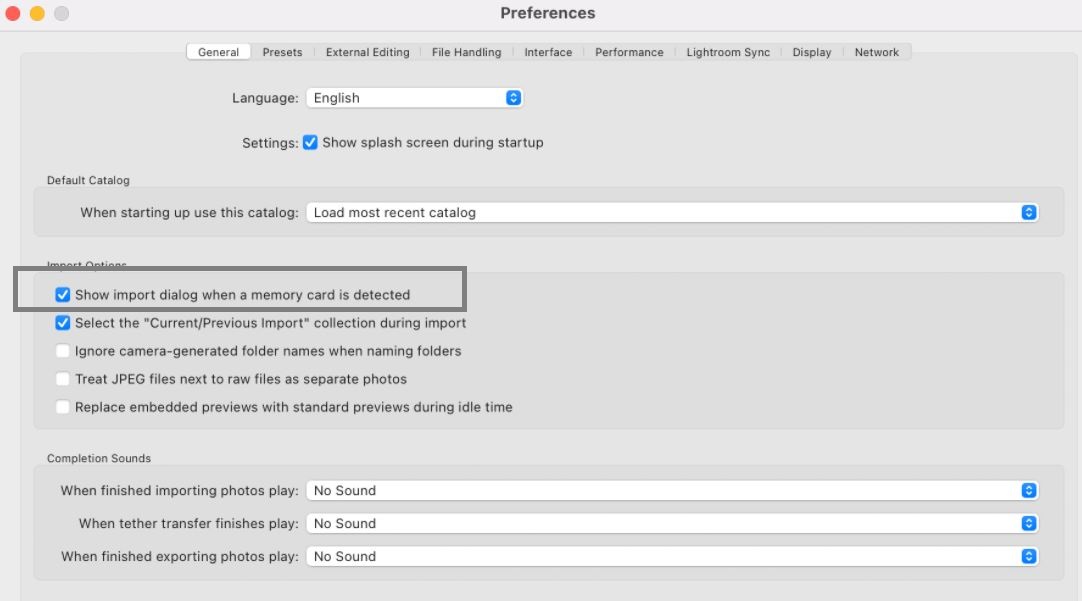
This enables a pop-up and helps Lightroom open and read your cards automatically as soon as you insert them into your computer.
2. Choose the right options in the File handling tab:
Under preferences, go to the “performance” tab and choose the location for “camera raw cache settings” to your fastest hard drive. This is where all the cache (temporary data) is stored when you are editing in Lightroom. Using a super-fast hard drive to retrieve all your temporary files while you edit photos in Lightroom will help LR generate faster previews and increase its general speed while editing (It can be the same drive where you are storing your catalogs)

Tip: Update your “maximum size” in the “file handling” tab to 100GB to ensure your HD has enough space to save all your catalogs and their caches
Click on the Purge Cache option every now and then to get rid of older caches and to re-render the latest caches.
Optimize your catalogs regularly to keep things refreshed.
3. Using Smart previews:
In the Preferences Tab, go to the ‘performance’ tab and select the “use smart previews instead of originals for image editing” option. Smart previews are previews that are extracted from your raw files, however, they are much lighter and take a very small amount of space while compared to the original RAW.
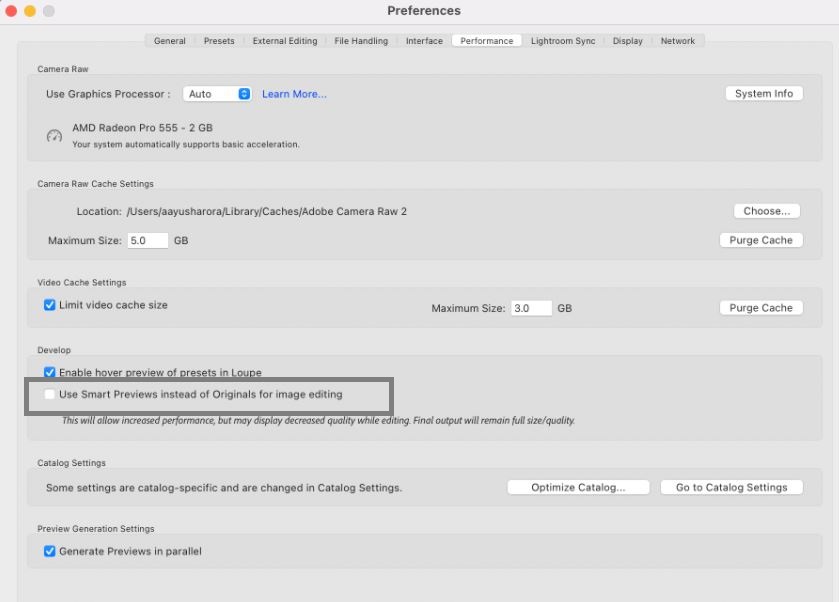
This enables Lightroom to work faster by rendering quicker previews when you are editing and therefore increases the workflow substantially.
Smart previews are non-destructive and all they do is decrease the size of your file. Your original raw files are intact and all the edits you have performed on your smart preview are by default applied to your original files as well.
4. File handling your catalogs:
In the catalog settings, go to the File Handling tab and check the resolution of the “standard preview size”. The one that is chosen is usually set by default to your computer’s display resolution, however, if you find that it is a lot higher than what is necessary, you can change the pixel size in the dropdown box to match that of your monitor’s size

Also, change the preview quality to ‘medium’ instead of ‘high’ to speed up the rendering of images. ( especially helpful if you have a 27 inch or larger monitor)

Another tip is to make sure you choose to “automatically discard 1:1 previews once you are done with that particular project. You can choose the time frame according to your needs.

5. Use Catalogs the right way:
Though many professionals follow the practice of using multiple catalogs, it is still best to stick to one catalog inside Lightroom.
It’s easier to search for your image files that are stored inside a single catalog. Retrieving a file by searching in multiple catalogs takes a longer time and is a little too tedious for your workflow.
Instead of using multiple catalogs, it’s always better to create multiple collections under one catalog and optimize your metadata with keywords and labels to retrieve your files faster.
Edit photos in Lightroom using quick tools and shortcuts.
Once you have your previews rendered into Lightroom it’s now time to work on the image editing part.
6. Colour Gradient tool:

The color gradient tool in the Develop Module has replaced the earlier split toning tool. The three separate color wheels can be used to quickly fix the shadows, highlights, and mid-tones individually and the global color wheel can be used as a common wheel to adjust all the above attributes at once.
7. Resetting only a part of the tonal changes you have made to the image:

If you want to reset only certain aspects of your image like contrast, highlights, shadows, etc… (but do not want to reset back to the original version), you can double click on the slider that you wish to reset under the Tone tab in Develop module and adjust the settings accordingly.
If you click on the Reset button at the bottom of the right panel in the Develop module, this will reset all the settings back to zero and you will have to re-do the whole process again.
8. ‘Batch edit” your photos:
Grouping similar photos and batch editing them is super simple and can save you a ton of time while you edit photos in Lightroom.
Choose any image in the group, make the necessary edits on the image like fixing the contrast, white balance, highlights, etc…
Then click on the edited image, press Shift, and drag to the last image in the group and click again.
And the effects are applied to all the images in the group.
Once all the images are selected press Sync. You can check all the options in the Sync window and only uncheck the ones that you think you cannot apply to all images (like crop or spot removal) and then press the synchronize button at the end.
9. Using Presets:
Using presets is the fastest way to edit your images. Creating customized presets that you can apply to a bunch of your images that come under the same category is one of the fastest ways to speed up your photo editing workflow.
Learn how to create presets here
10. Using keyboard shortcuts:
Most of us use keyboard shortcuts, but learning all of them by heart is the best way to expedite your process in Lightroom.
You can refer to Adobe’s User guide for a complete list of keyboard shortcuts in Lightroom here.
A quick tip to cut down your workflow time when you edit photos in Lightroom:
Culling photos in Lightroom can take a ridiculous amount of time and can be a big setback for your workflow.
Using dedicated photo culling software can cut down that time by 10X times by ingesting photos with lightning speed.
Learn how to cull 1000s of photos in 10 mins using FilterPixel here
Conclusion
These were some tips to increase your photo editing workflow inside Lightroom. Hope you liked them!
Also, read our Digital Photography Workflow series below.
- How to find the best photoshoot locations
- Essential Checklists for photoshoots
- How to back up photos in 2021
- Photo Culling Workflow
Look out for our “SEO for Photographers” post that is coming up shortly.
-Jun-19-2026-12-08-11-9138-PM.png)
-2.png)