FilterPixel Edits is an AI-powered plugin for Lightroom Classic that helps photographers edit their photos automatically using AI.
Users can either use expert profiles or create their own custom profiles that can be used to edit photos based on their editing style.
To create your own model, you need a Lightroom catalog with at least 5,000 photos with smart previews. However, users can test out the expert profiles on the go to edit their photos.
How to install the FilterPixel Edits plugin in Lightroom Classic?
To install the plugin, first, extract the zip file downloaded to a specified location.
How to sign up for FilterPixel edits?
- Go to Files —> Plugin Extras.
- Click on “Edit with FilterPixel”.
- FilterPixel window will open with a login page. Click on “Sign Up” right below it and enter the details to sign up.
- After signing up, you can now go back to the login page and enter the same details to log in.
How to edit photos using FilterPixel edits?
After you have successfully logged in, you can now edit your photos inside Lightroom Classic using the expert profiles.
- Go to the Lightroom library and select all the photos you want to edit.
- Go to Files —> Plugin Extras.
- Click on “Edit with FilterPixel”.
- The FilterPixel Edits screen will open with different profiles on the side. You can preview the before and after results of those profiles and choose according to your liking.

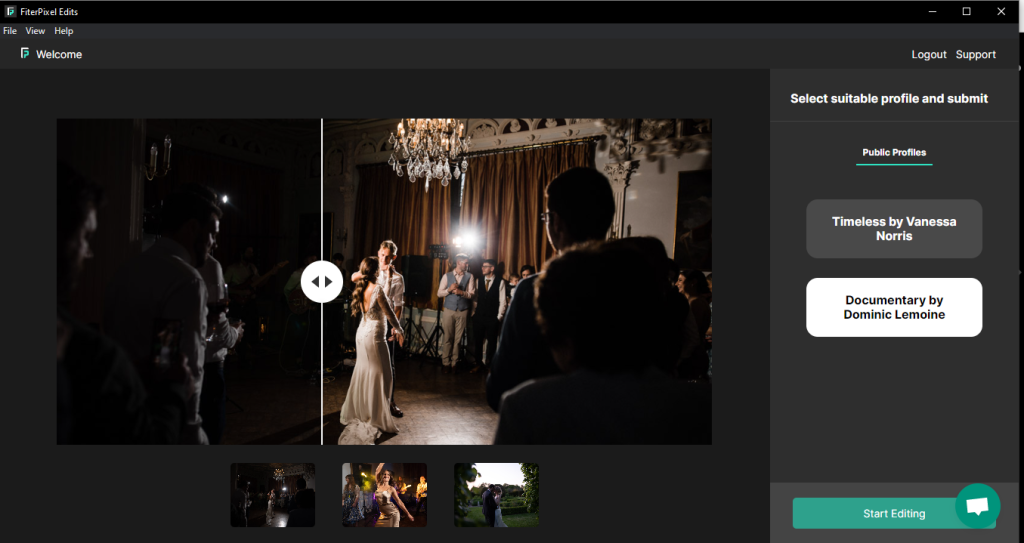
- After you have decided on the profile, you can click on “Start Editing”.
- FilterPixel edits will start editing your photos in Lightroom and after the editing is done, you can click on “Close and Review” to go back to Lightroom Classic.
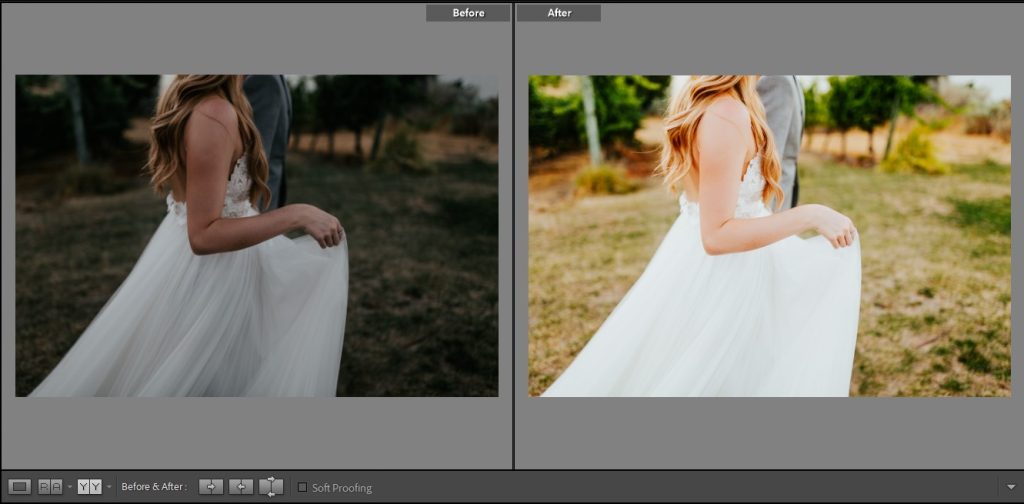
- After coming back to Lightroom Classic, you will notice all your photos being edited according to the profile you have selected. You can review them and make any changes according to your liking.
How to create your own profile in FilterPixel Edits?
To create your own AI editing profile in FilterPixel edits, you need at least 5000 edited photos along with smart previews.
- Open Lightroom Classic and go to Files.
- Go to plugin extras —> train with FilterPixel.
A window will open showcasing all the requirements to build your profile.
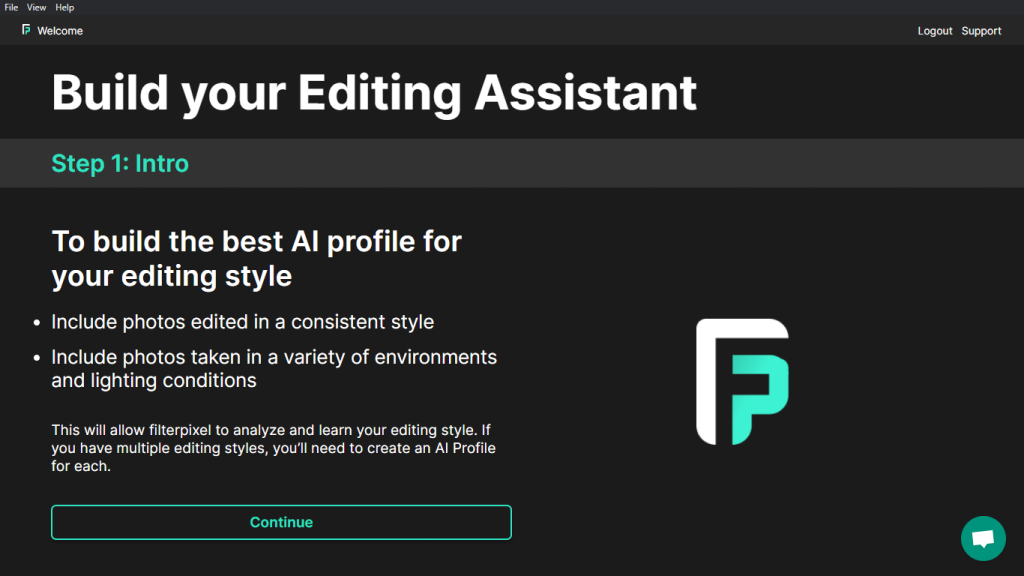
Step 1: Click “Continue” and move on to the next step.
Step 2: Select “Train new model”
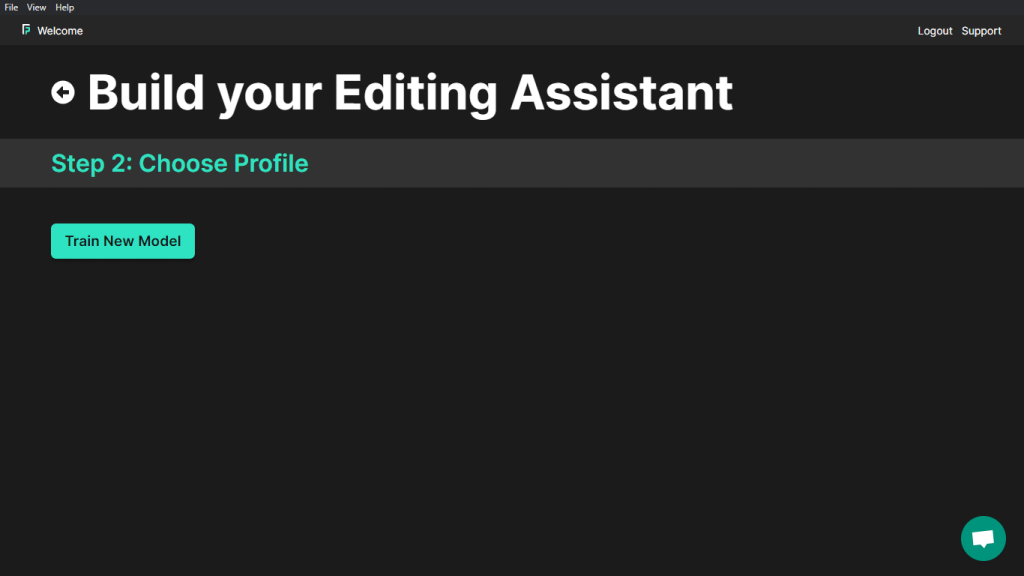
Step 3: Name this profile so you can easily identify it.
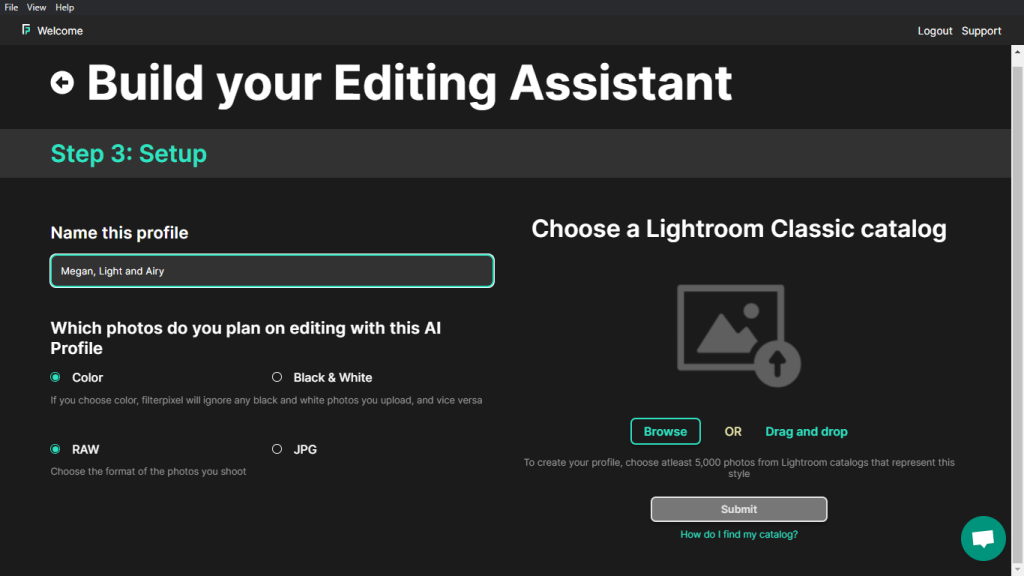
Name your profile and select the options that match your photo specifications. If you are creating a colored profile, choose colour, and choose the file format of the photos that you shoot in.
On the right, choose the Lightroom Classic catalog to upload by clicking on ‘browse’, or simply drag and drop your catalog file and click “Submit”.
Step 4: Select your images in the catalog
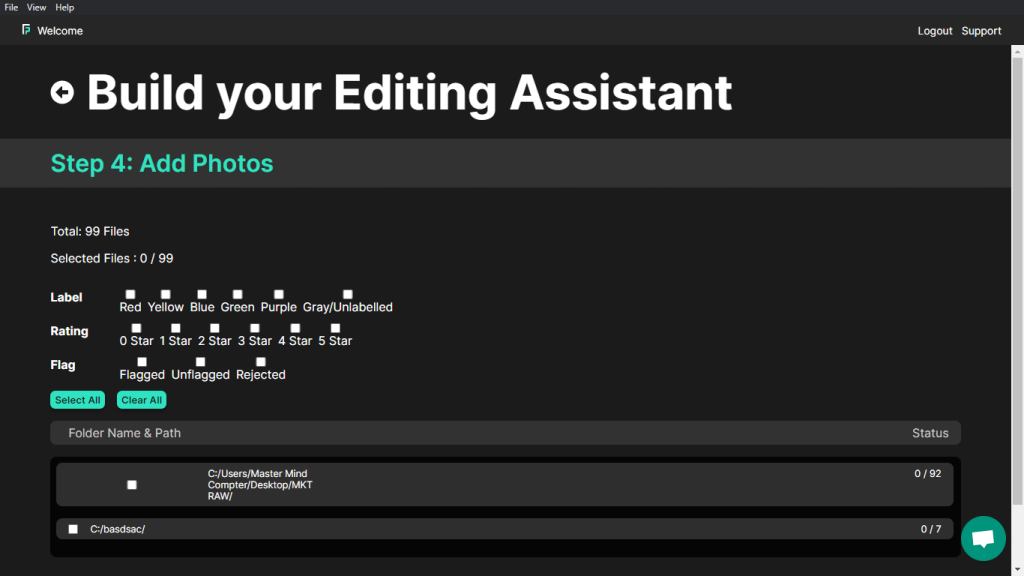
Here you can select the photos inside the Lightroom catalog that you want to use to train the profile. If your edited photos are flagged, colored, or rated in any way, you can filter them out and click submit.
Note: The minimum image requirement to create a personal model is 5,000 photos.
Congrats! You have submitted your photos to create your profile, and it will be ready to use within 24 hours. Once your profile is ready, you will receive an email telling you that your profile is ready.
How to add more photos to your profile for training?
After your model is trained, you can add more photos to your profile for more accurate editing results. To add more photos to your profile:
- Go to file → Plugin extras → Train with FilterPixel
- A window will open with step 1 telling you the requirements for training your photos.
- Skip to step 2 and go to “Your profiles” and select the existing profile that you want to improve.
- Select the Lightroom catalog and upload photos that you want to add to the profile for training.
- Click ‘submit’.
Your profile will be trained and improved with the newly added images and be ready to use within 24 hours!
I hope this article guided you in using FilterPixel Edits. If you have any questions or suggestions please feel free to email us at support@filterpixel.com